Custom DAW Controller with Trill Flex
Designing a bespoke interface for the home music studio
In this post we look at project by Philipp Noertersheuser who created a custom controller for his DAW (digital audio workstation) for music making at home. Philipp designed a custom flex PCB to mate with our Trill Flex.
Creating a custom control interface
Philipp’s goal was to design a controller which would fit into his current workflow in his home studio. He has recently been focusing on orchestral arrangements and composition and so want an interface where he could easy switch between various setting of VSTs and speed up his workflow.
Evolution of the design
Before looking in detail at the build let’s have a look at the evolution of Philipp’s design.
Prototype 1 with Softpots
The first prototype was created with 3 Softpot membrane potentiometers. These resistive sliders work in a similar way to potentiometers (hence the name Softpot). Instead of the resistance at the wiper of the pot changing when the dial is rotated, in the case of Softpots the resistance at the contact point changes when we press our finger on the sensor.
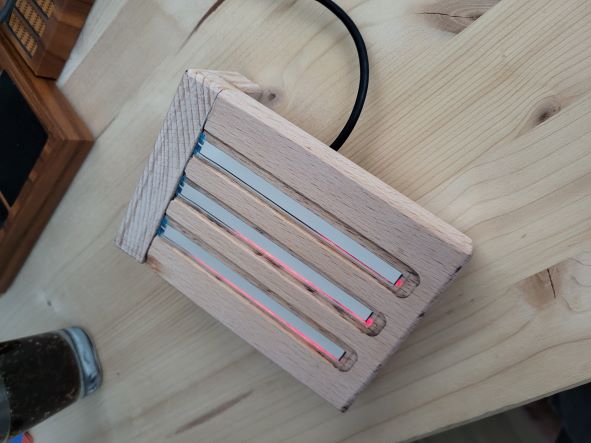
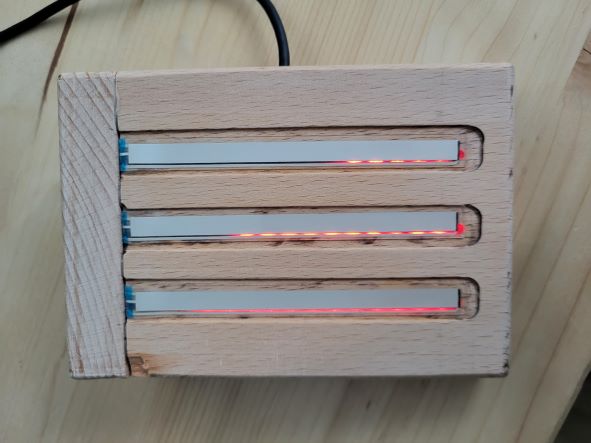
The first prototype made with Softpot membrane potentiometers.
Philipp mounted LED strips behind each slider using WS2812B addressable LEDs meaning that the colour and intensity of every individual LED can be controlled. Not being 100% happy with the stability of the readings from the Softpots, Philipp went looking for other solutions.
Prototype 2 with Trill Bar and Square
The next prototype switched from resistive sensing to capacitive sensing. Philipp chose to use 3 Trill Bar sensors in combination with a Trill Square sensor.
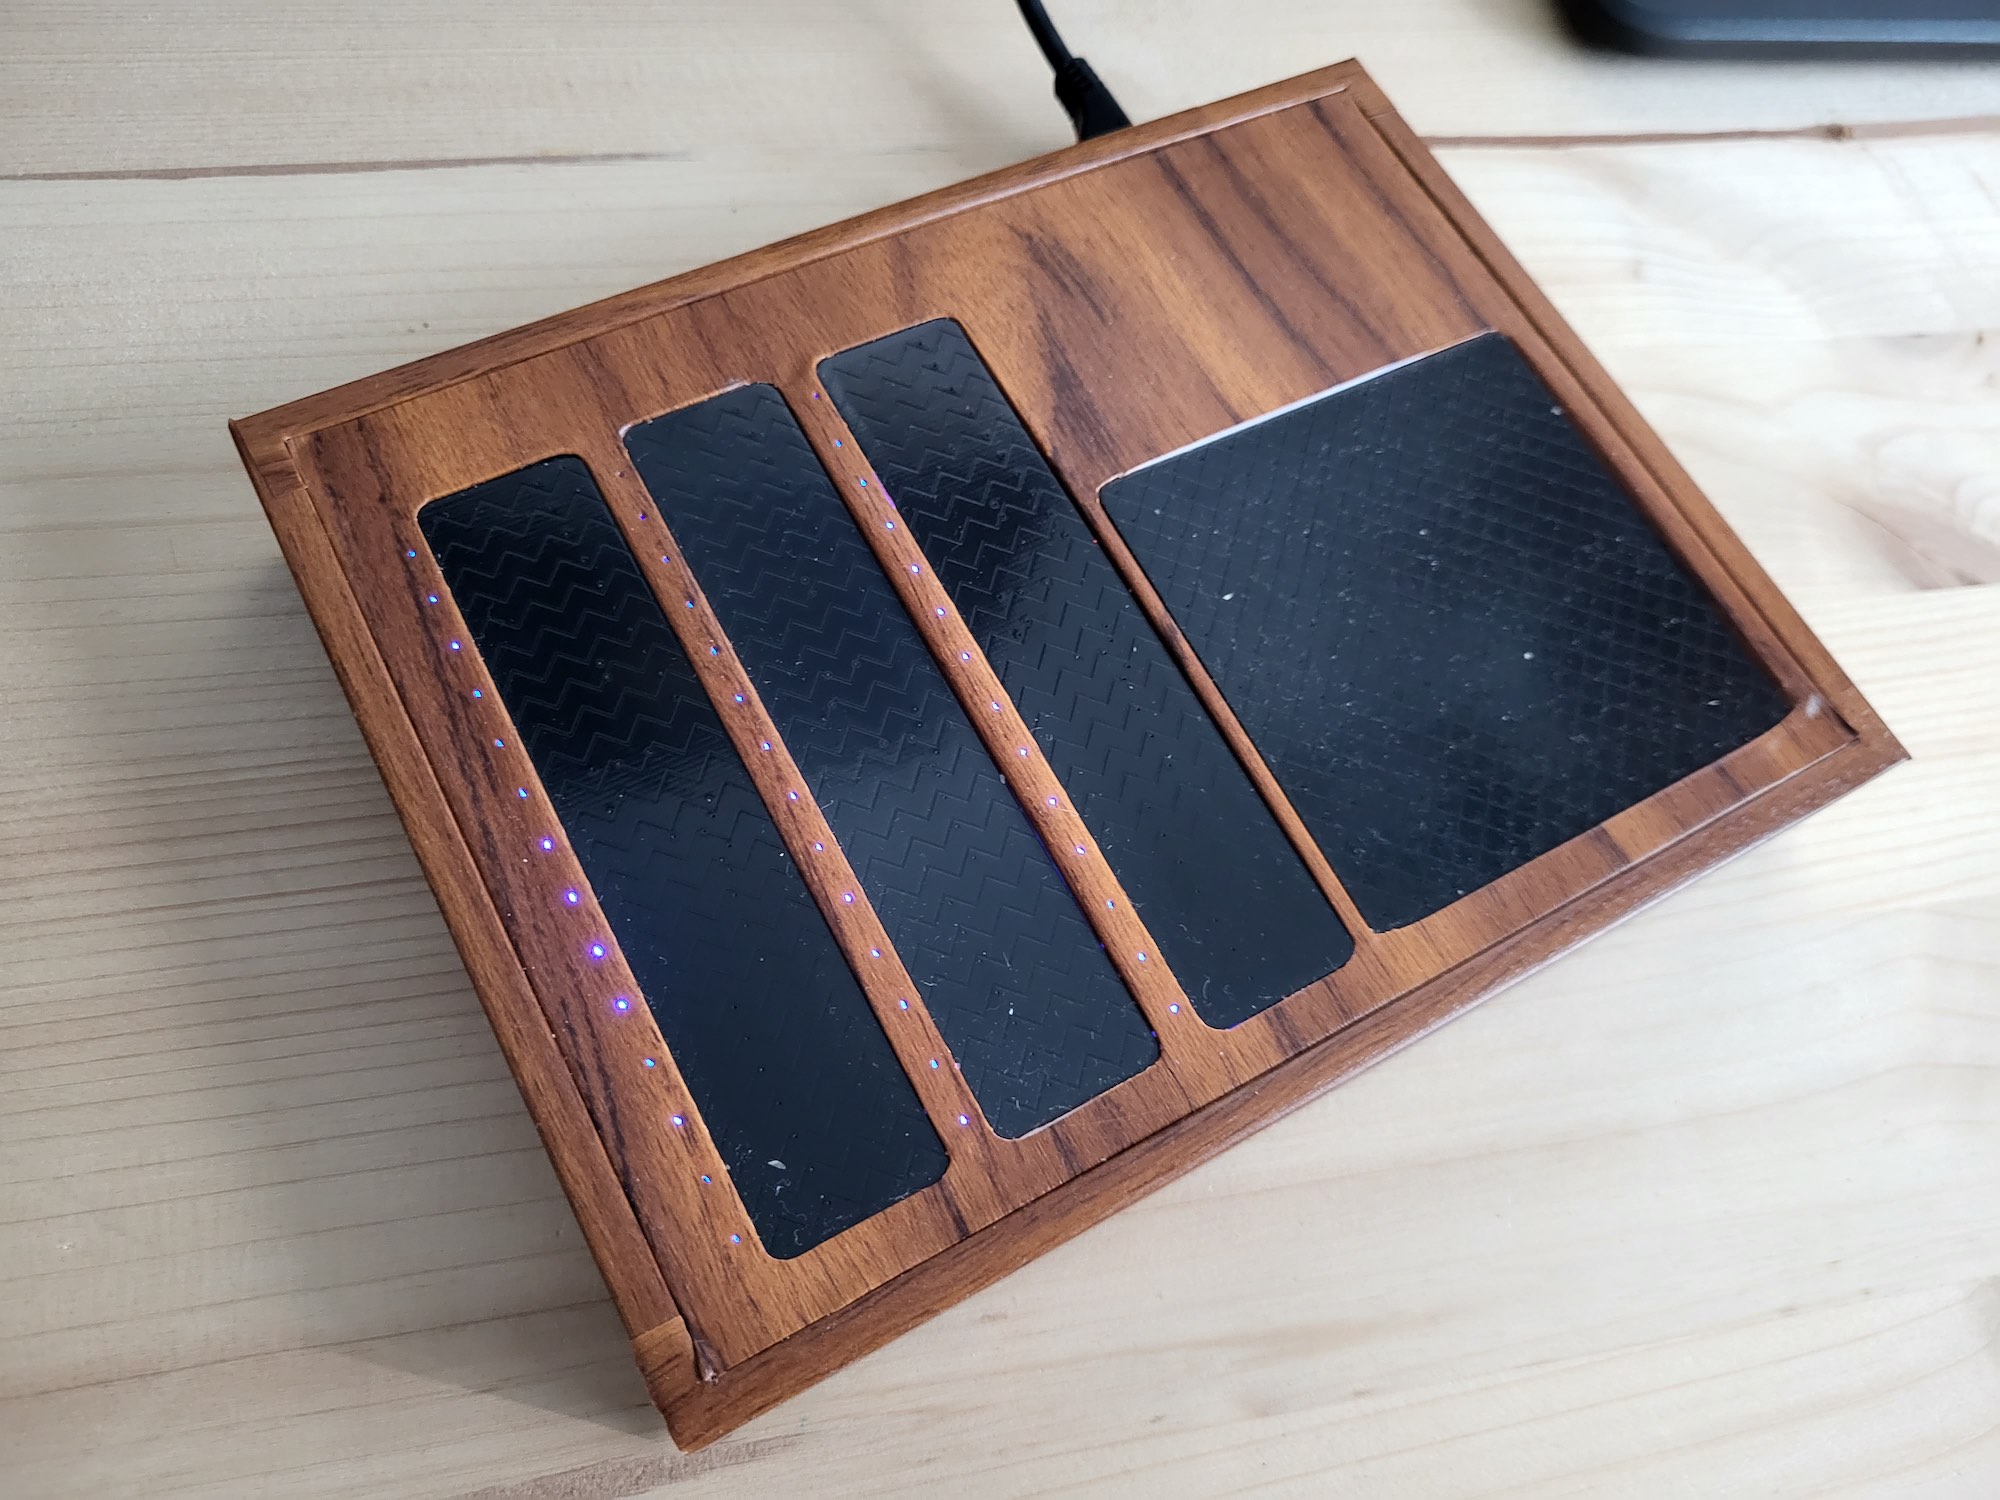
The second prototype with capacitive touch sensors.
The same LED strips were used behind the sensor to indicate touch position and he also 3D printed a case to house all the electronics inside. An Arduino microcontroller was used to read from the sensors, send out MIDI messages and control the colour and intensity of the LEDs.
The addressable LED strips which are mounted behind the touch sensors.
In order to make a more compact design which utilised all available space Philipp switched sensor again.
Prototype 3 with Trill Flex
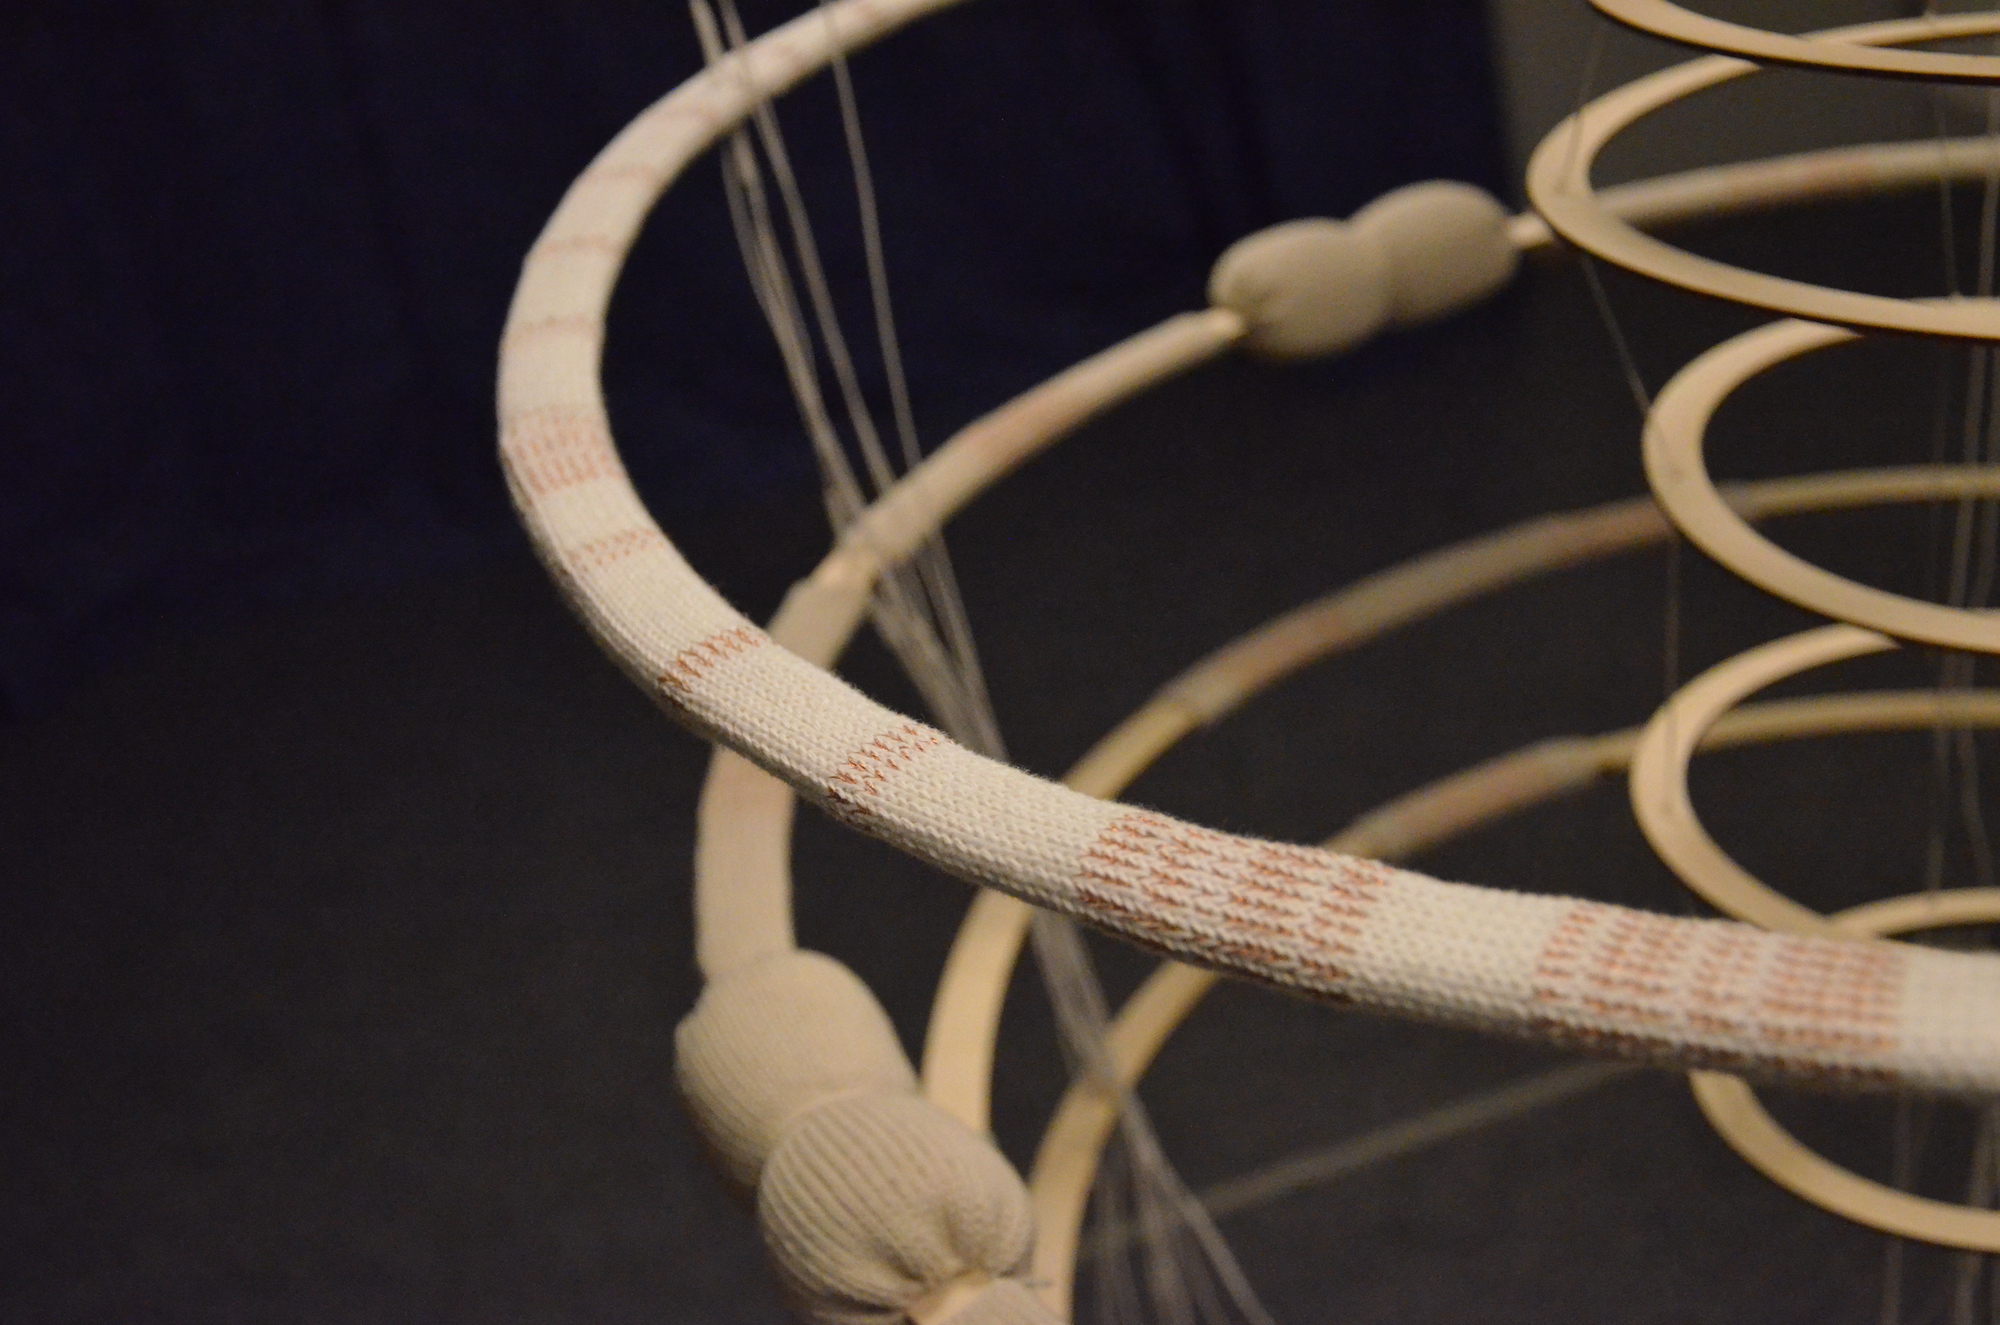
For the final revision of the interface Philipp decided to use our Trill Flex sensor and to design a custom flex PCB part to incorporate all the controls into one surface.
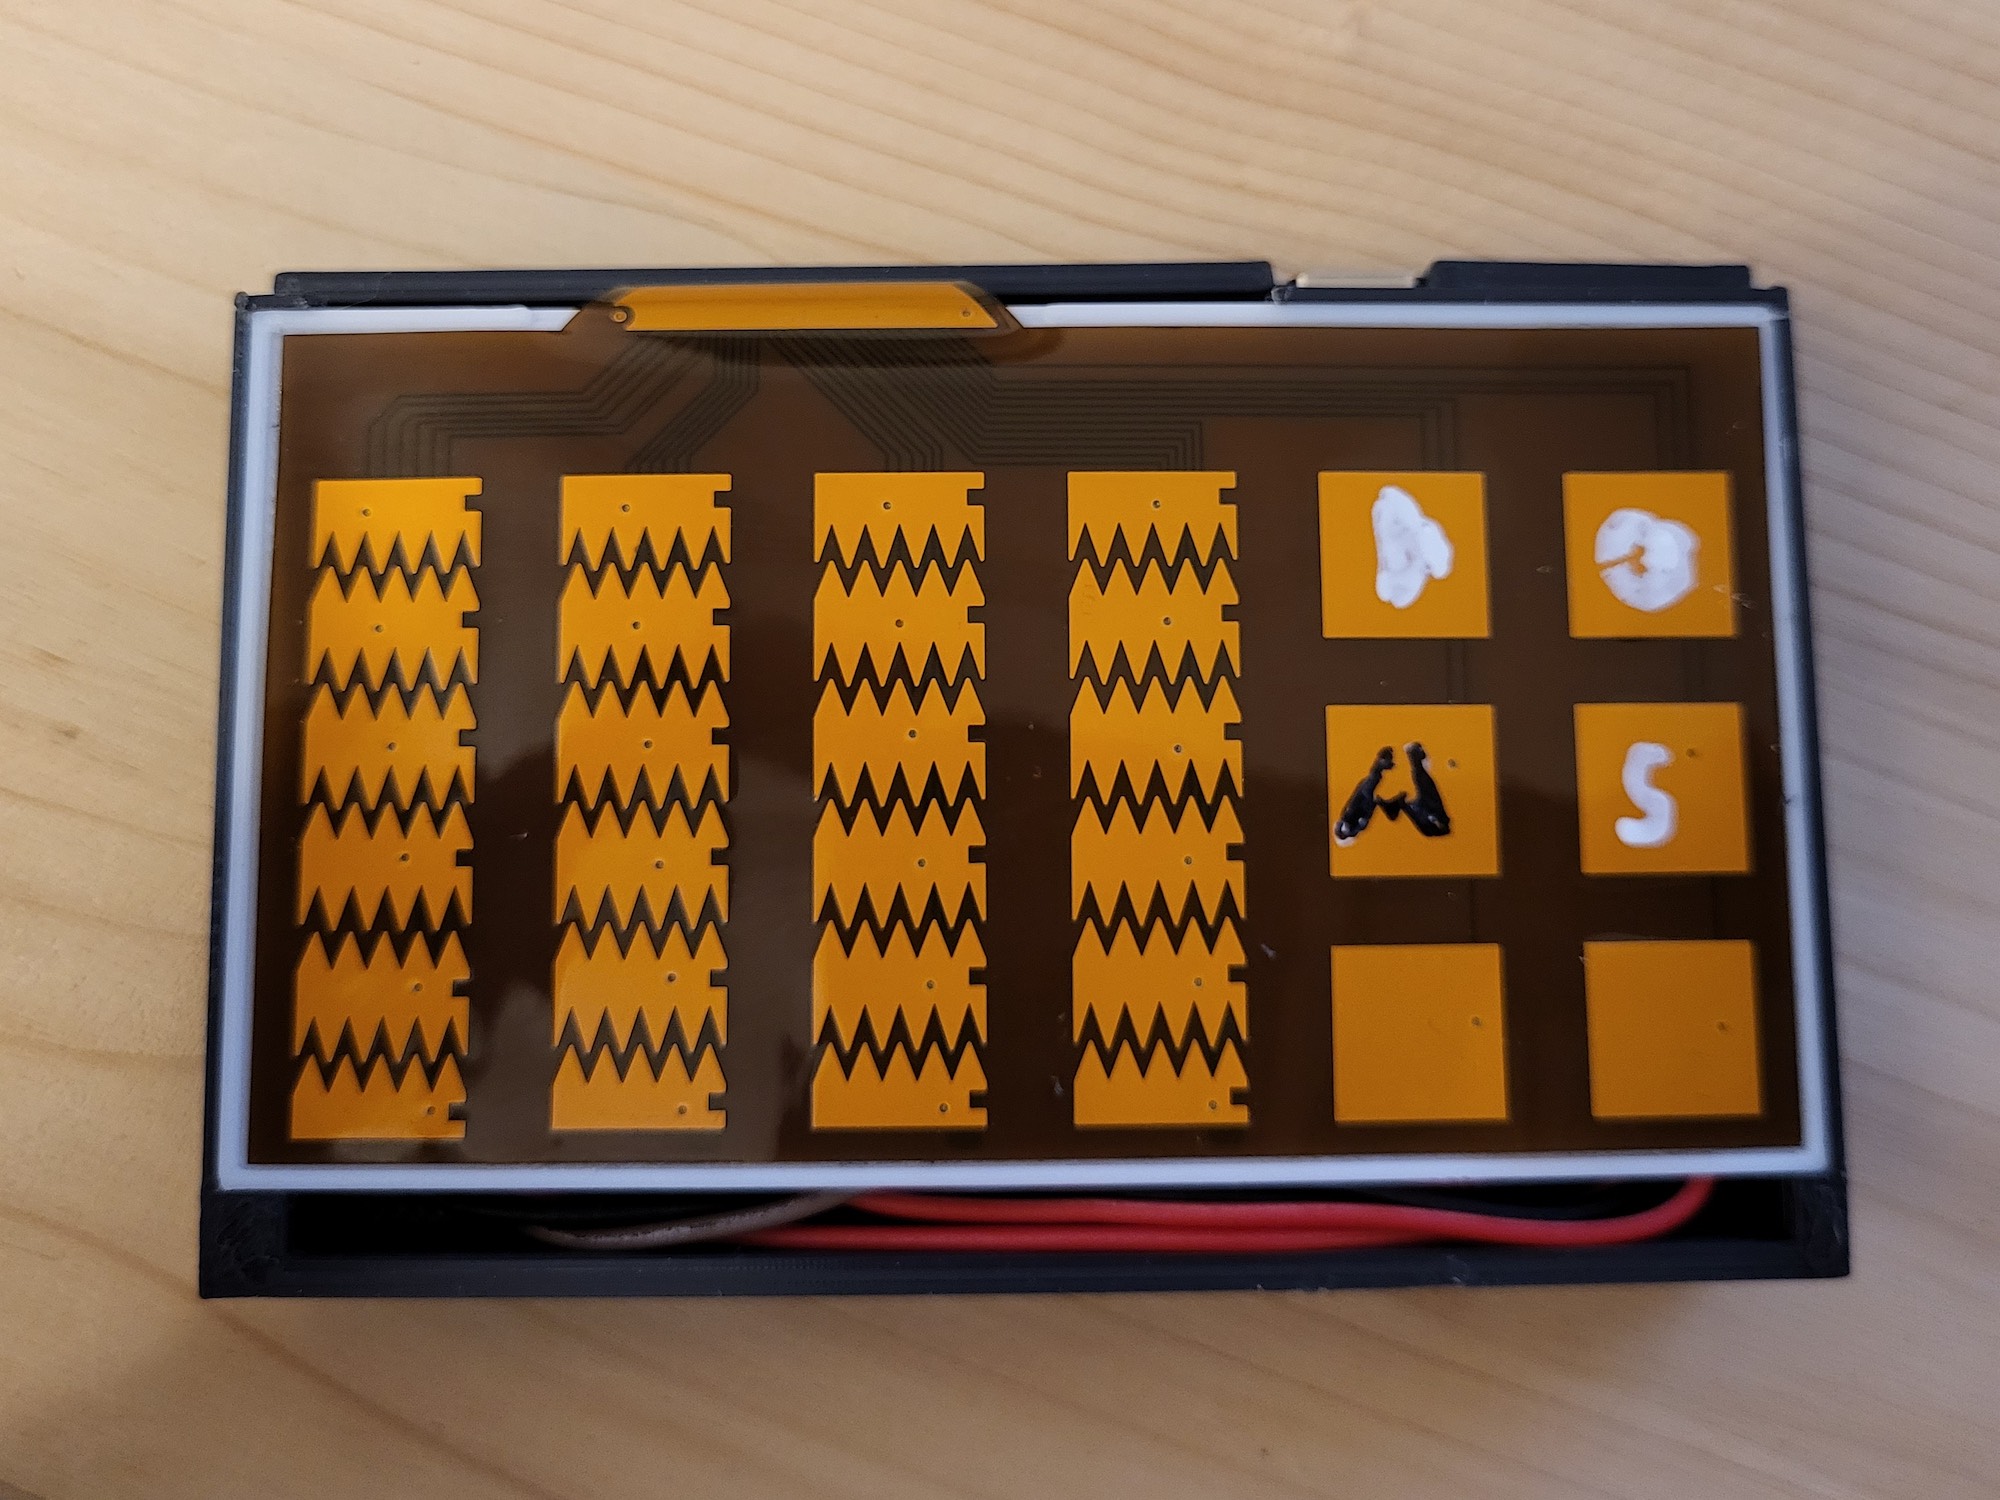
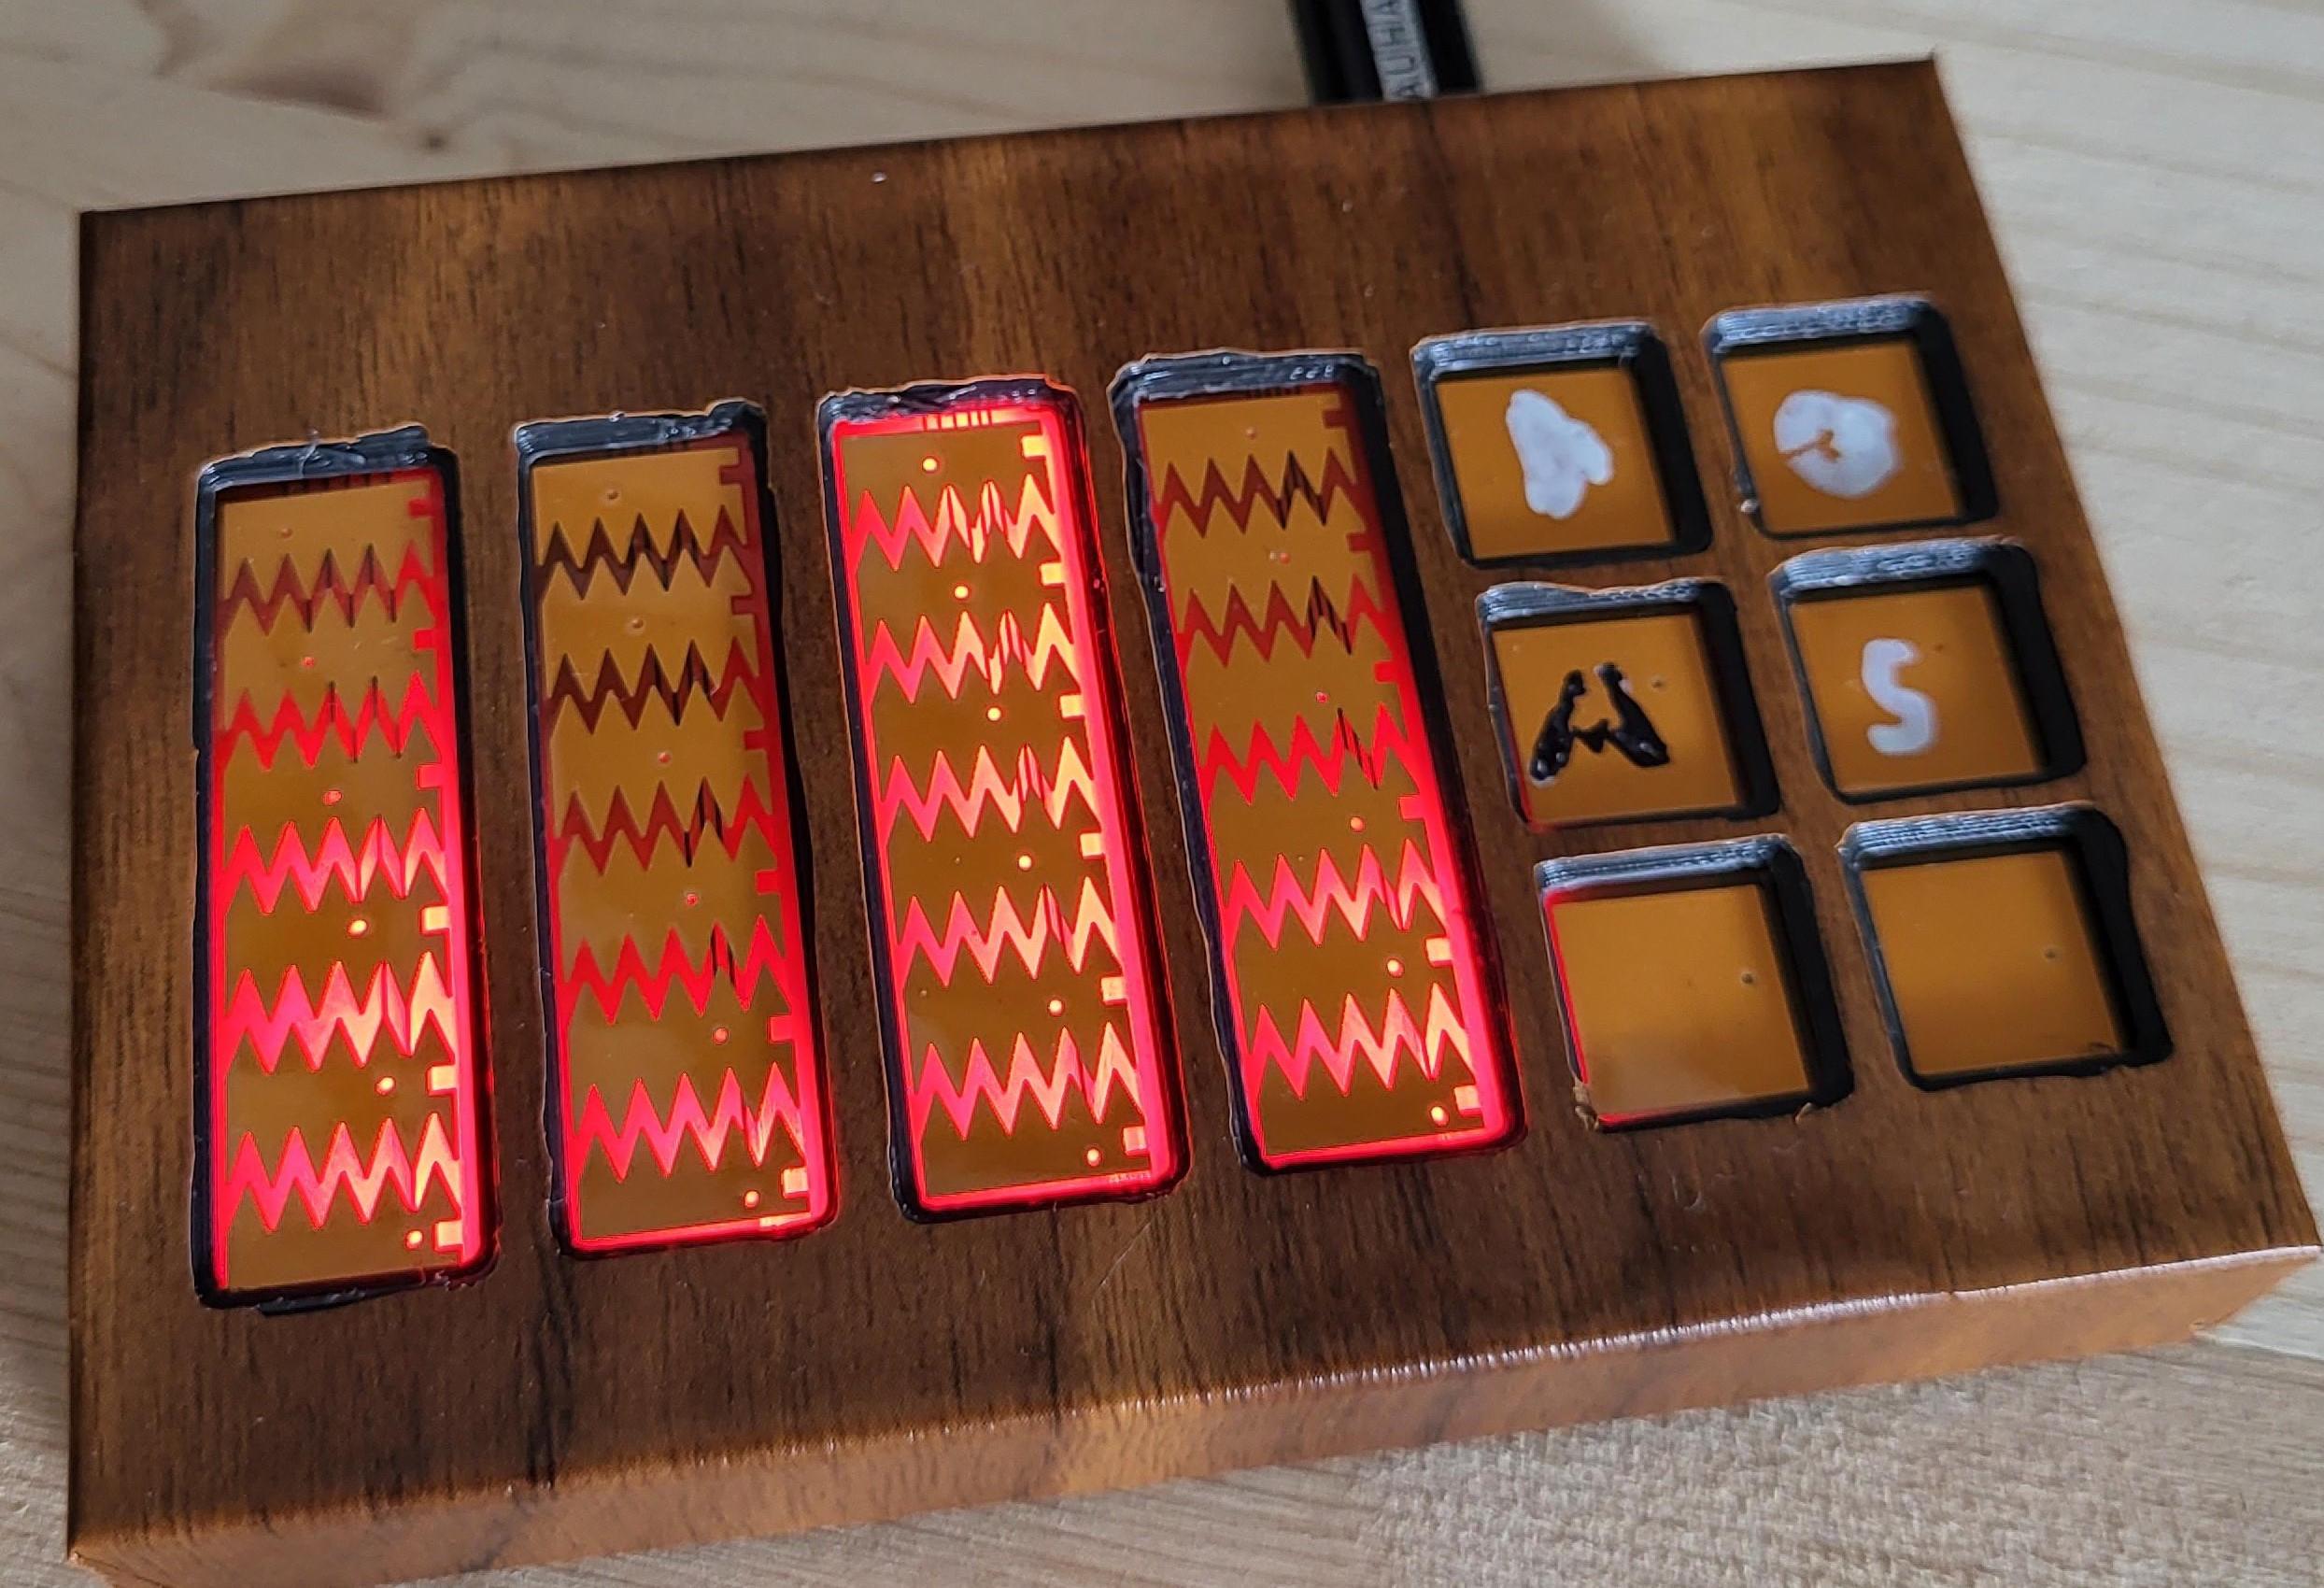
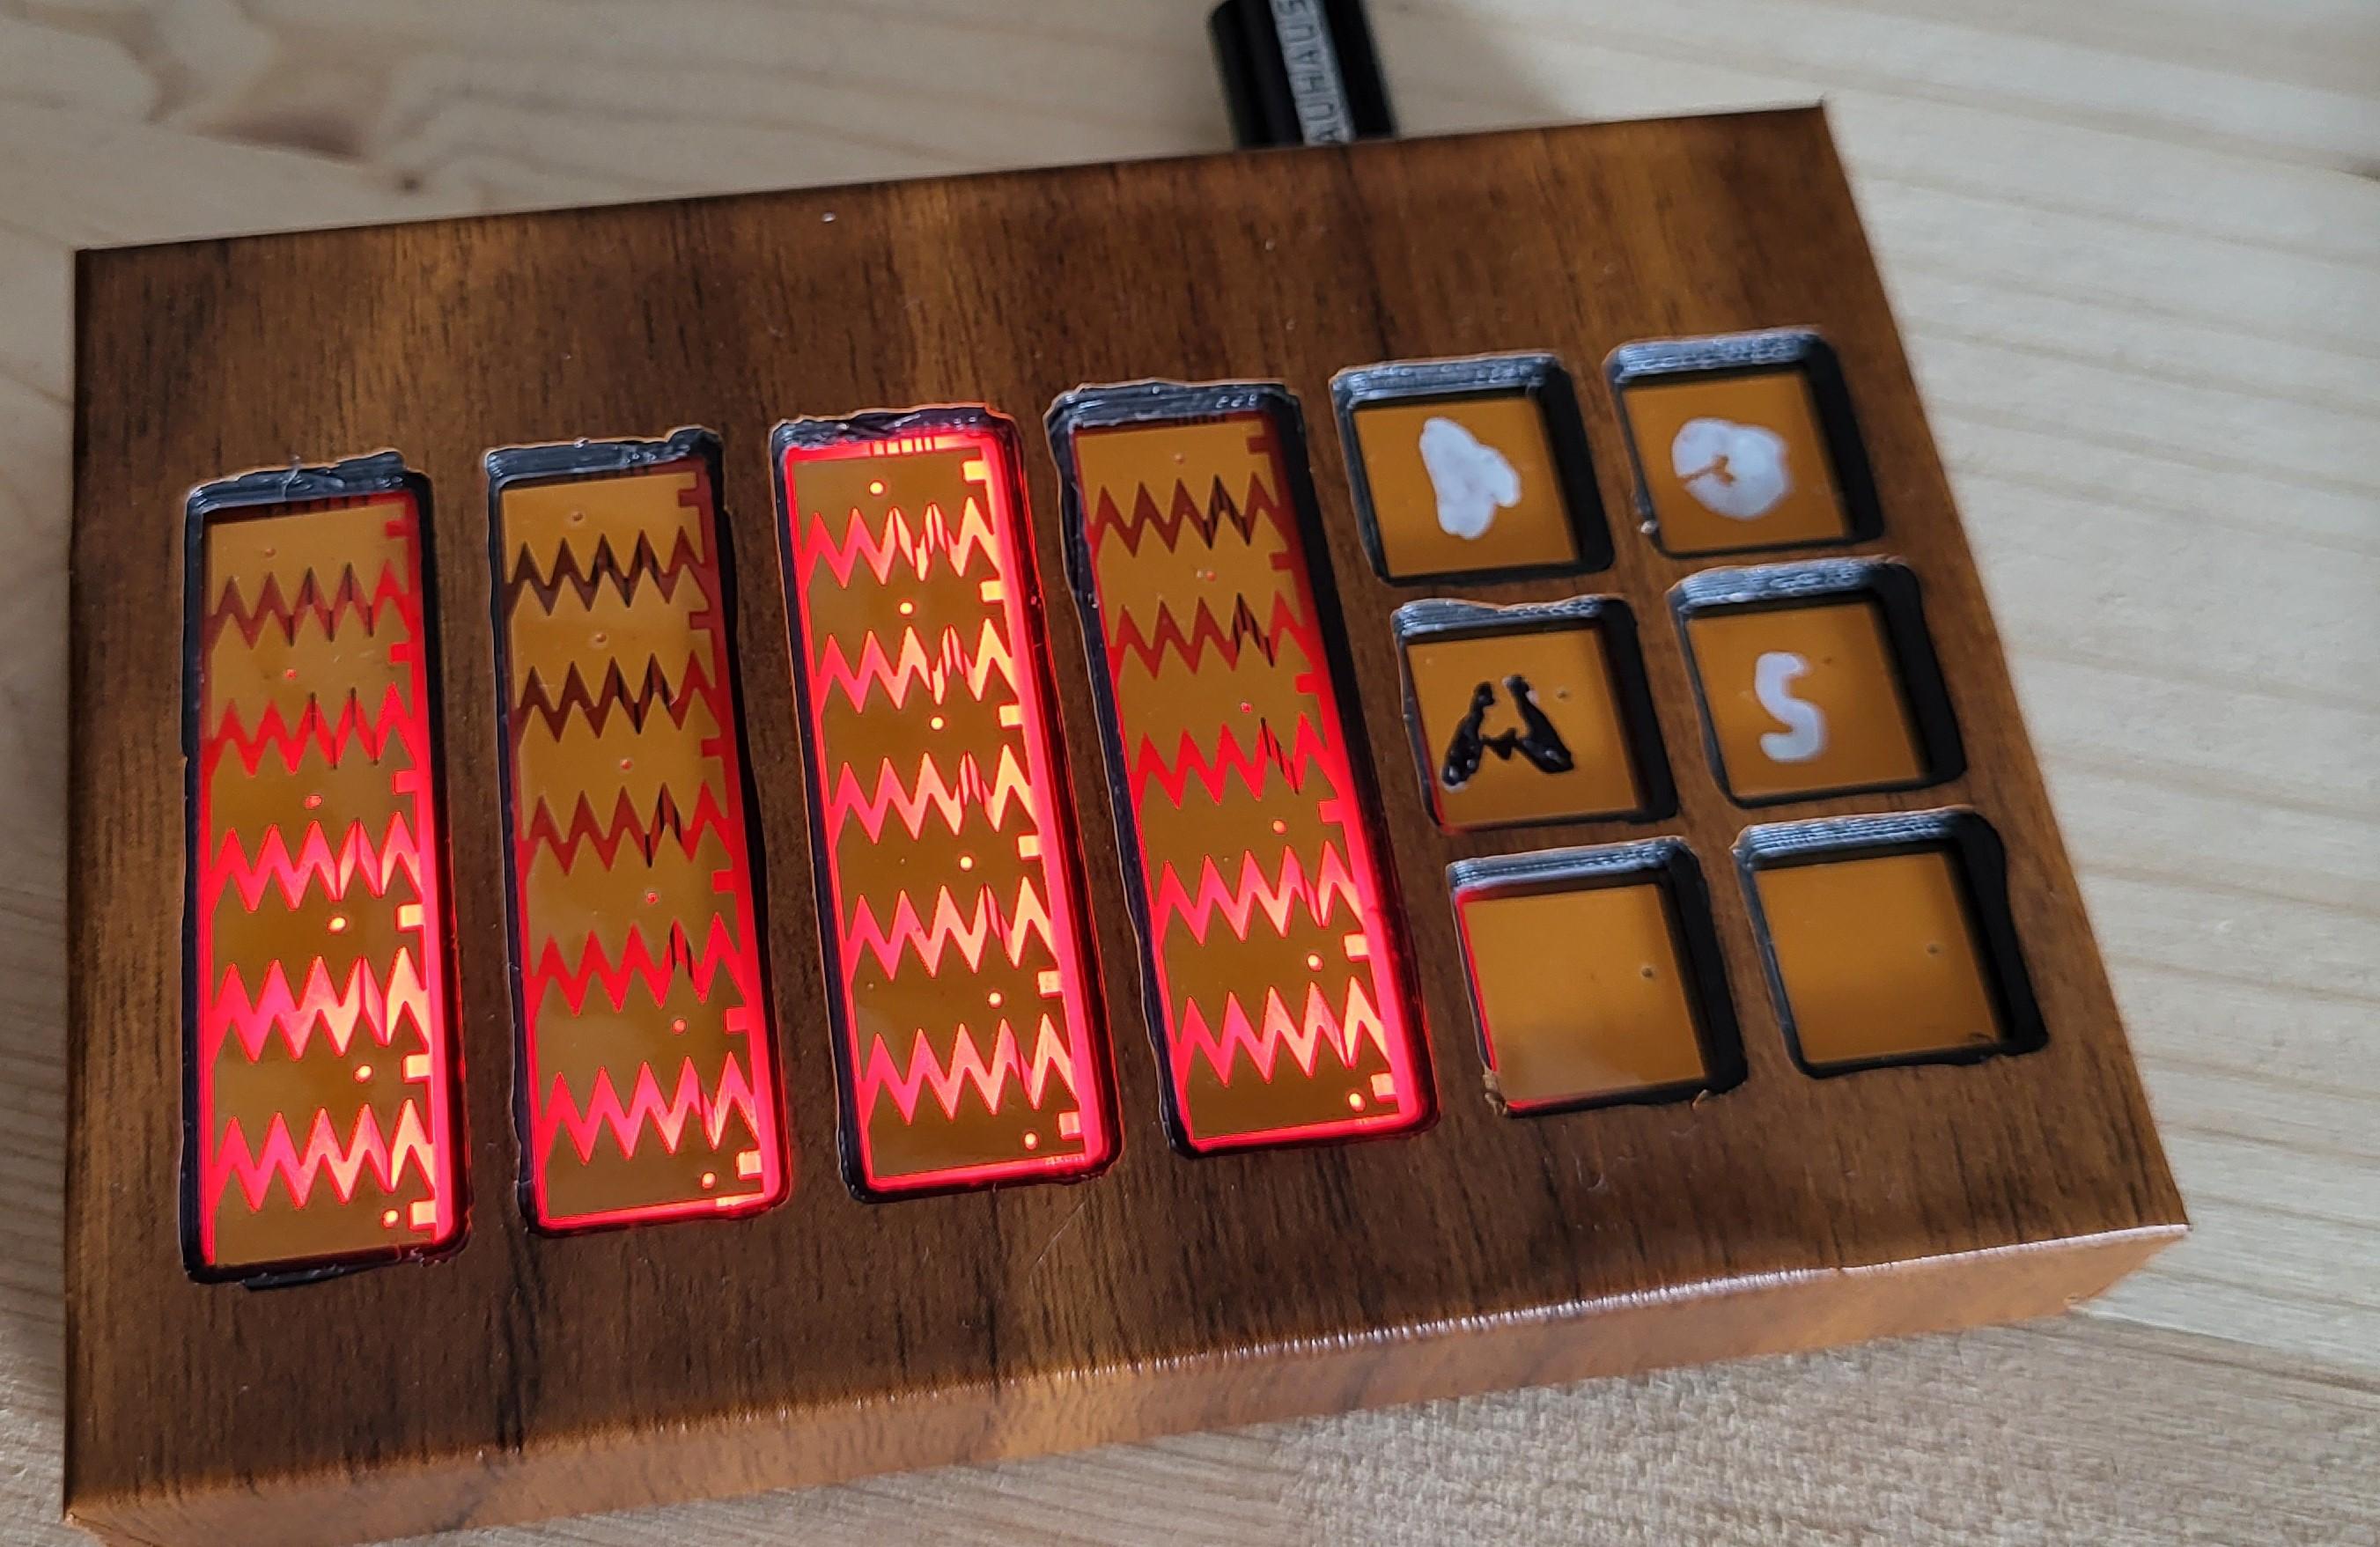
The custom printed flex PCB sensor which is the main interface.
This design includes 4 sliders, each made from 6 capacitive pads which interpolated via a zigzag design, alongside 6 capacitive buttons. This made the most of the 30 channels of capacitive sensing available on Trill Flex. You can download the KiCad project for this sensor here and below we will give more information on designing your own custom flex PCB.
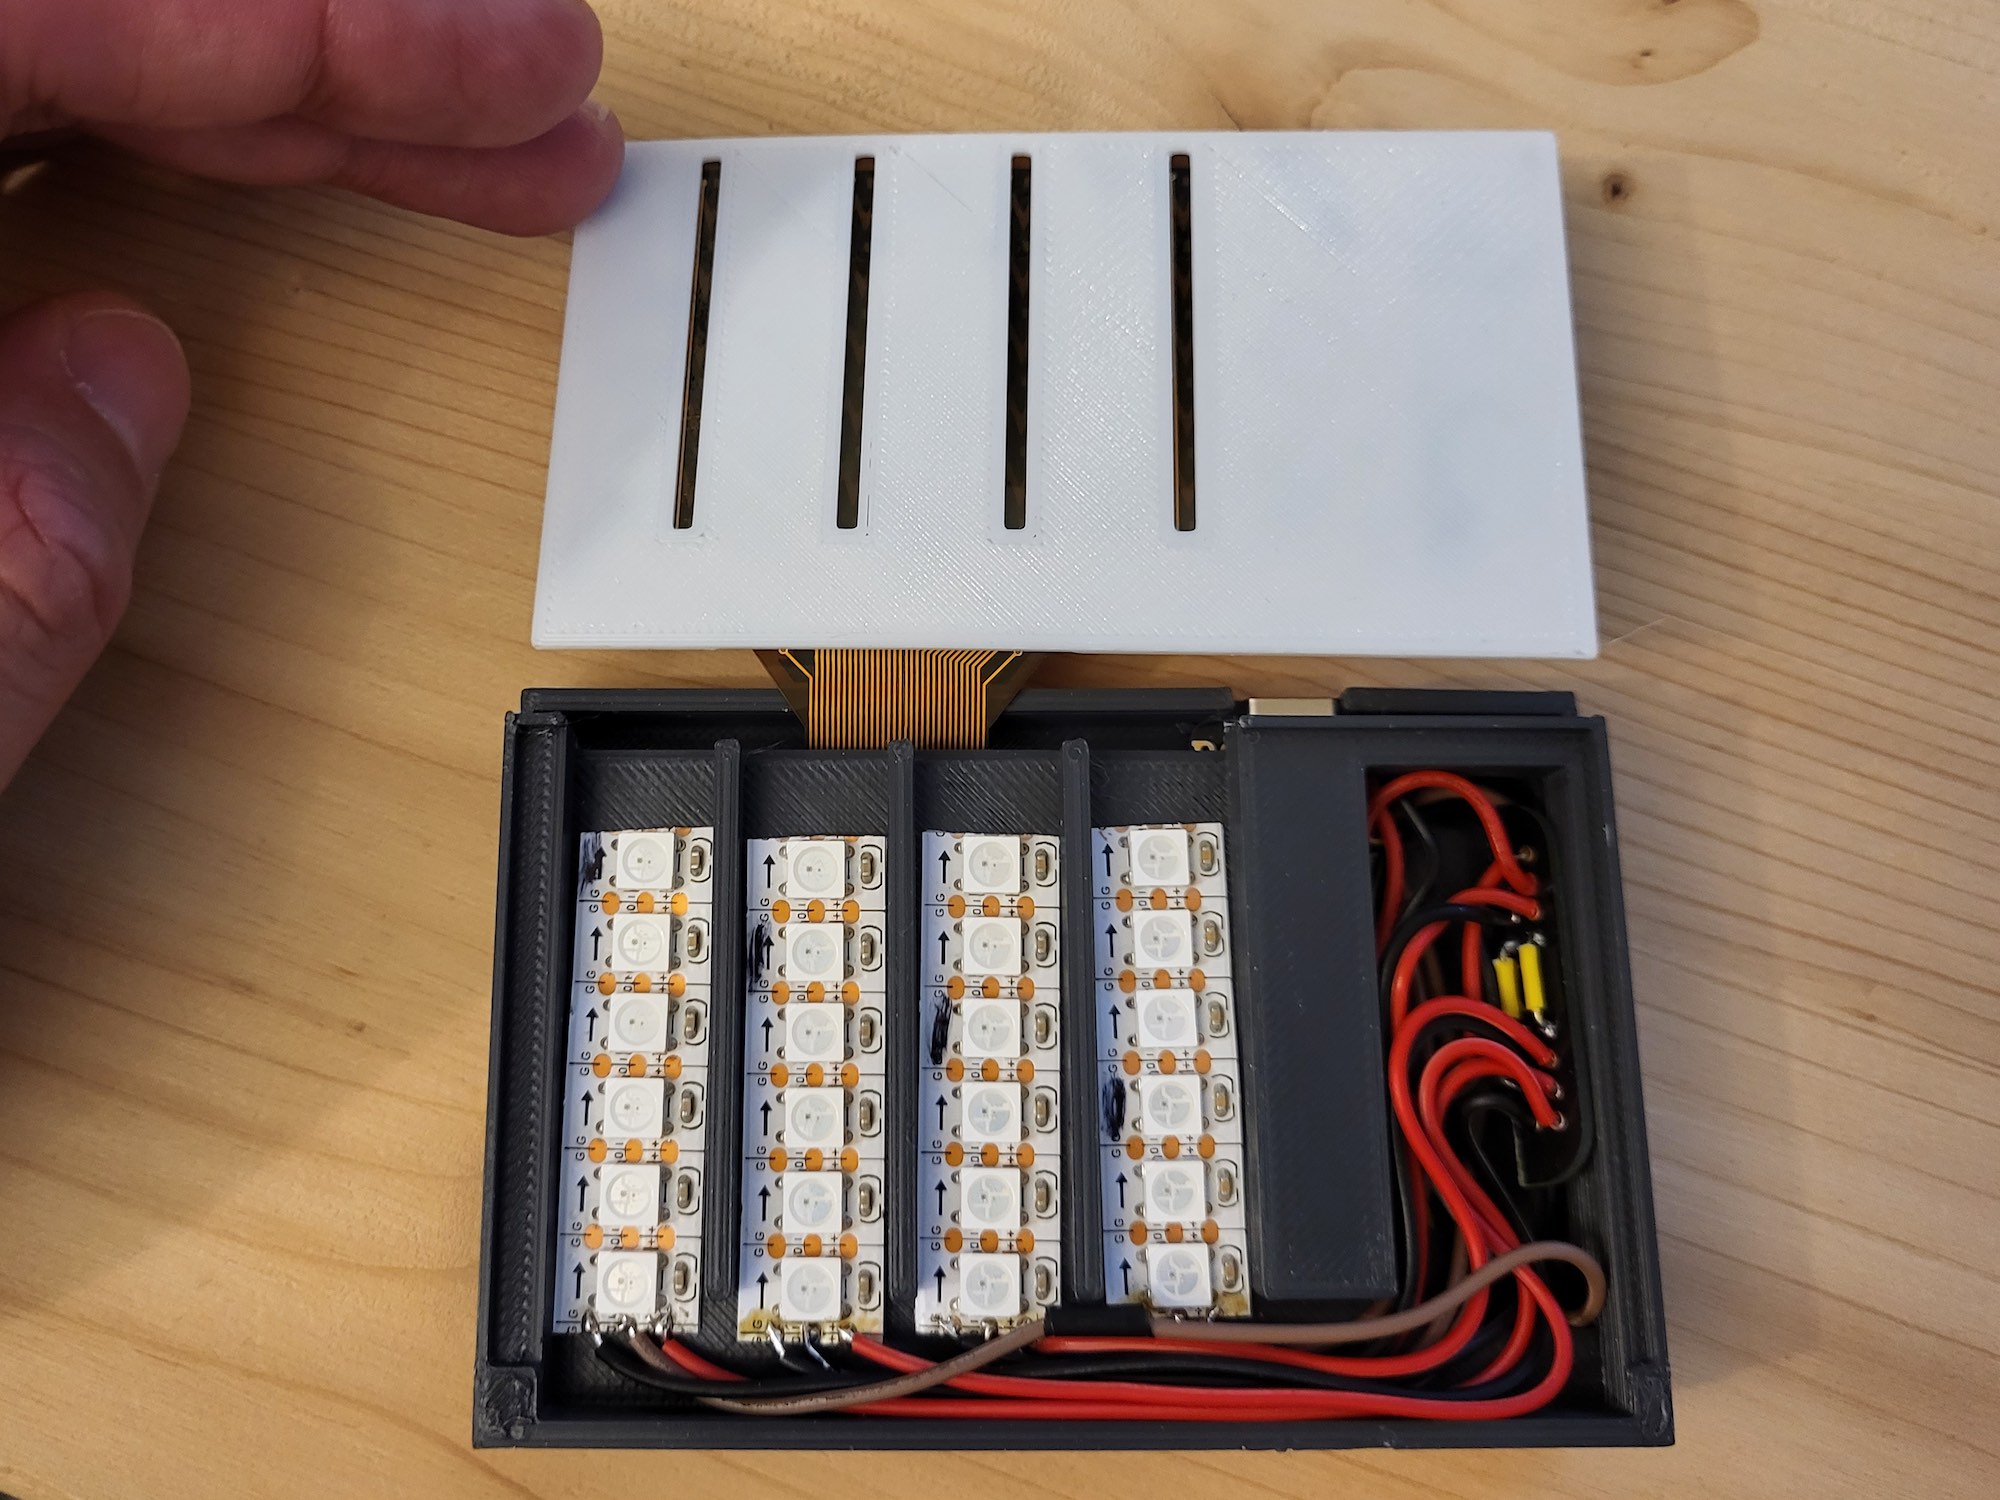
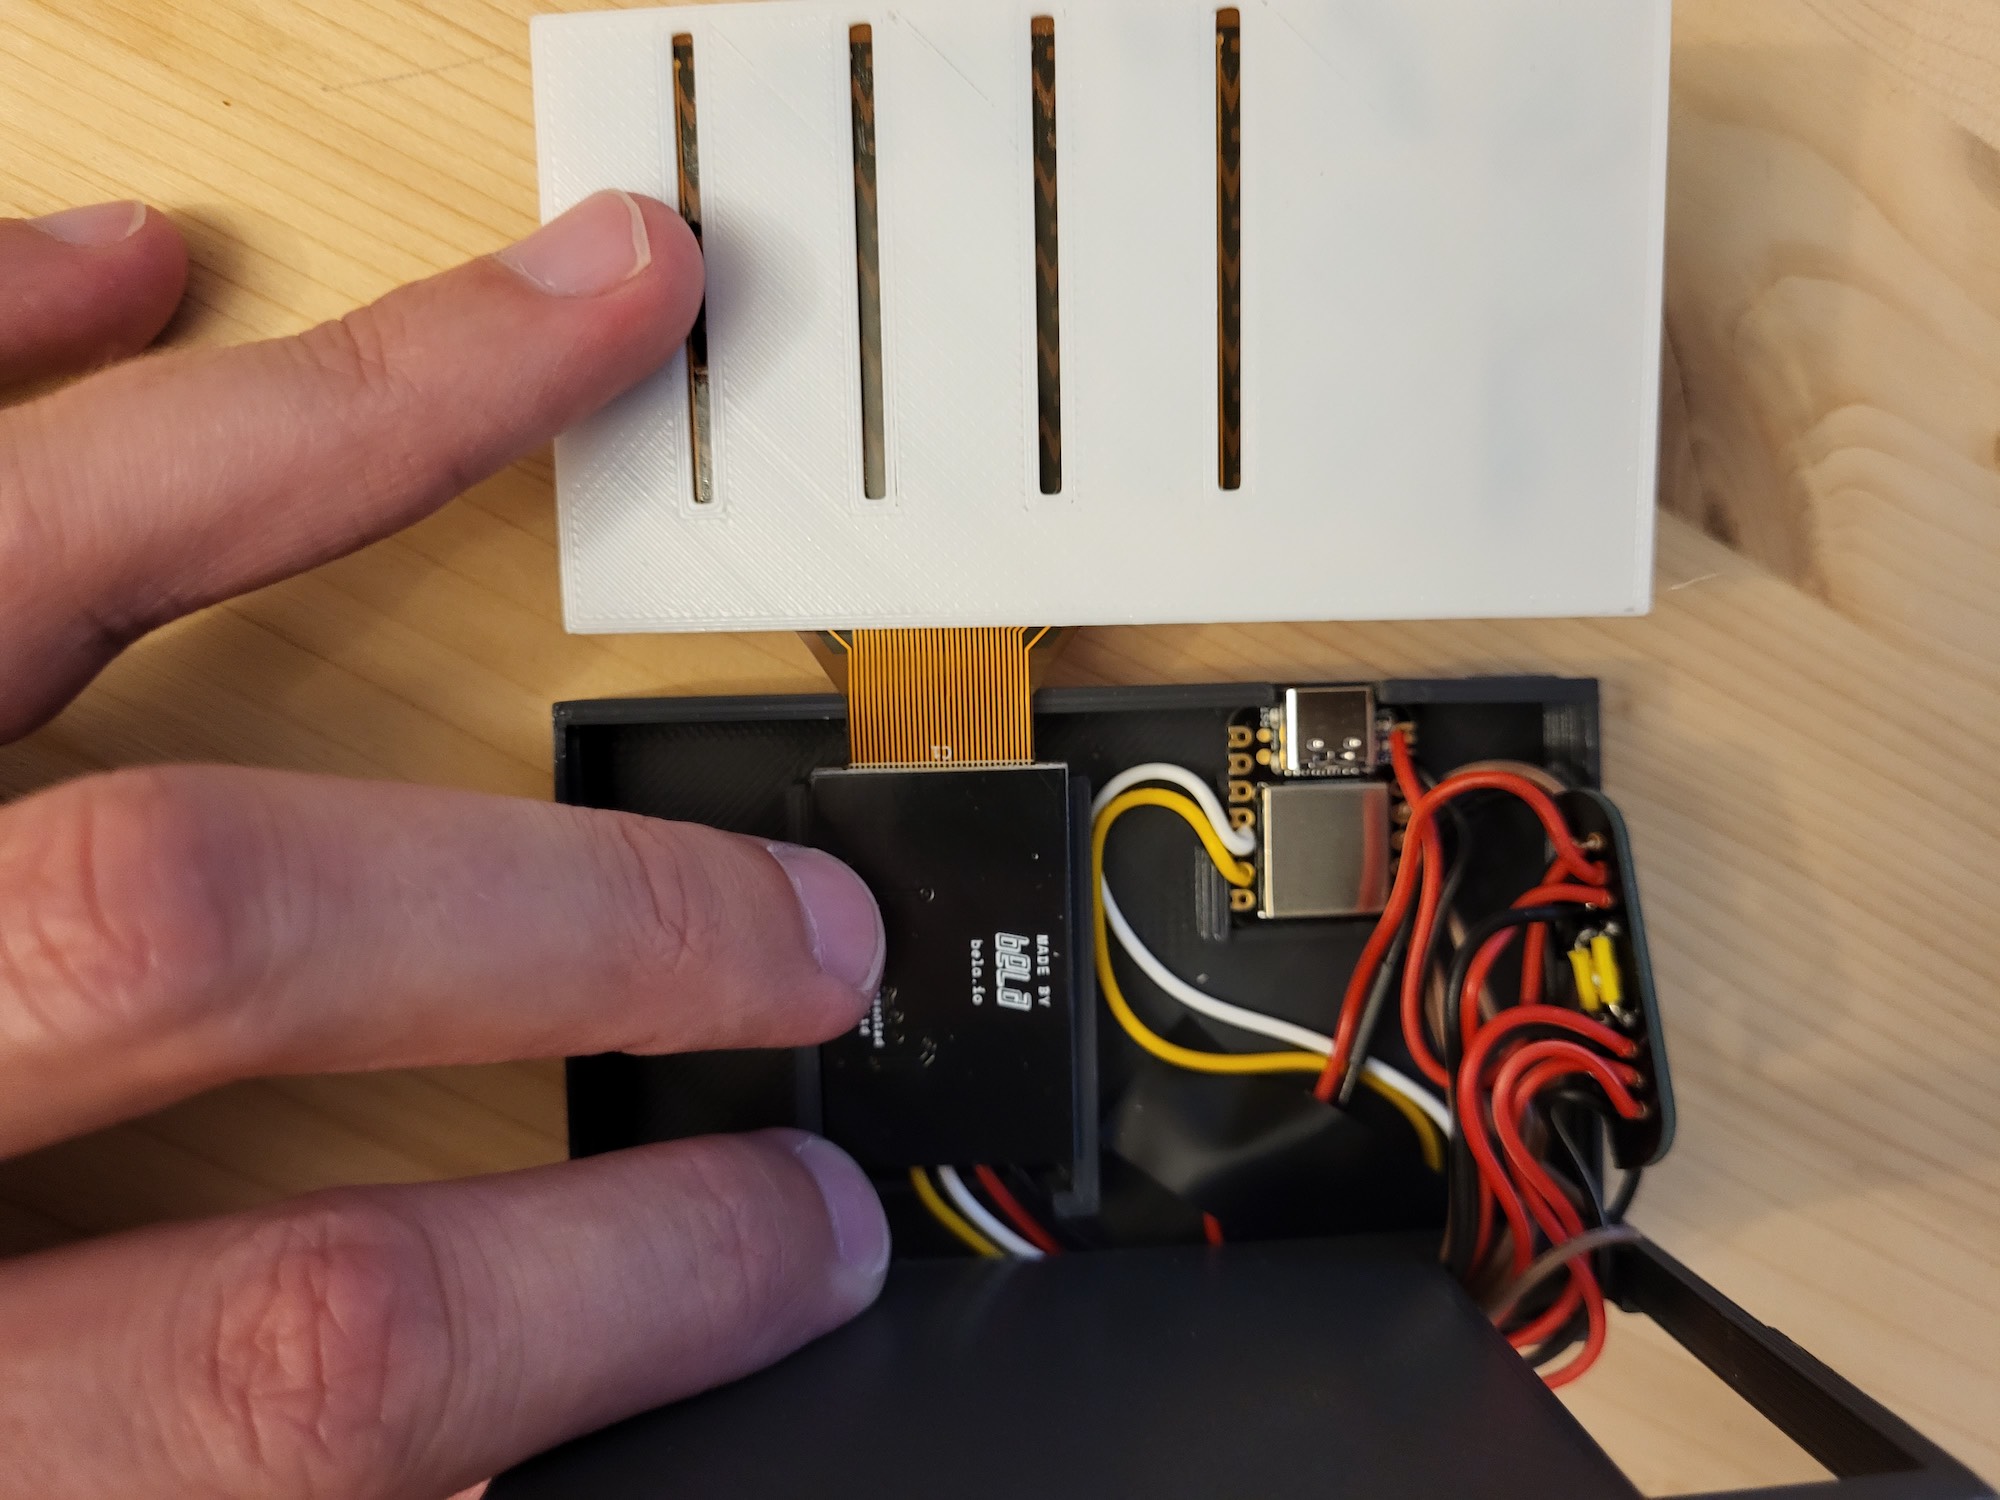
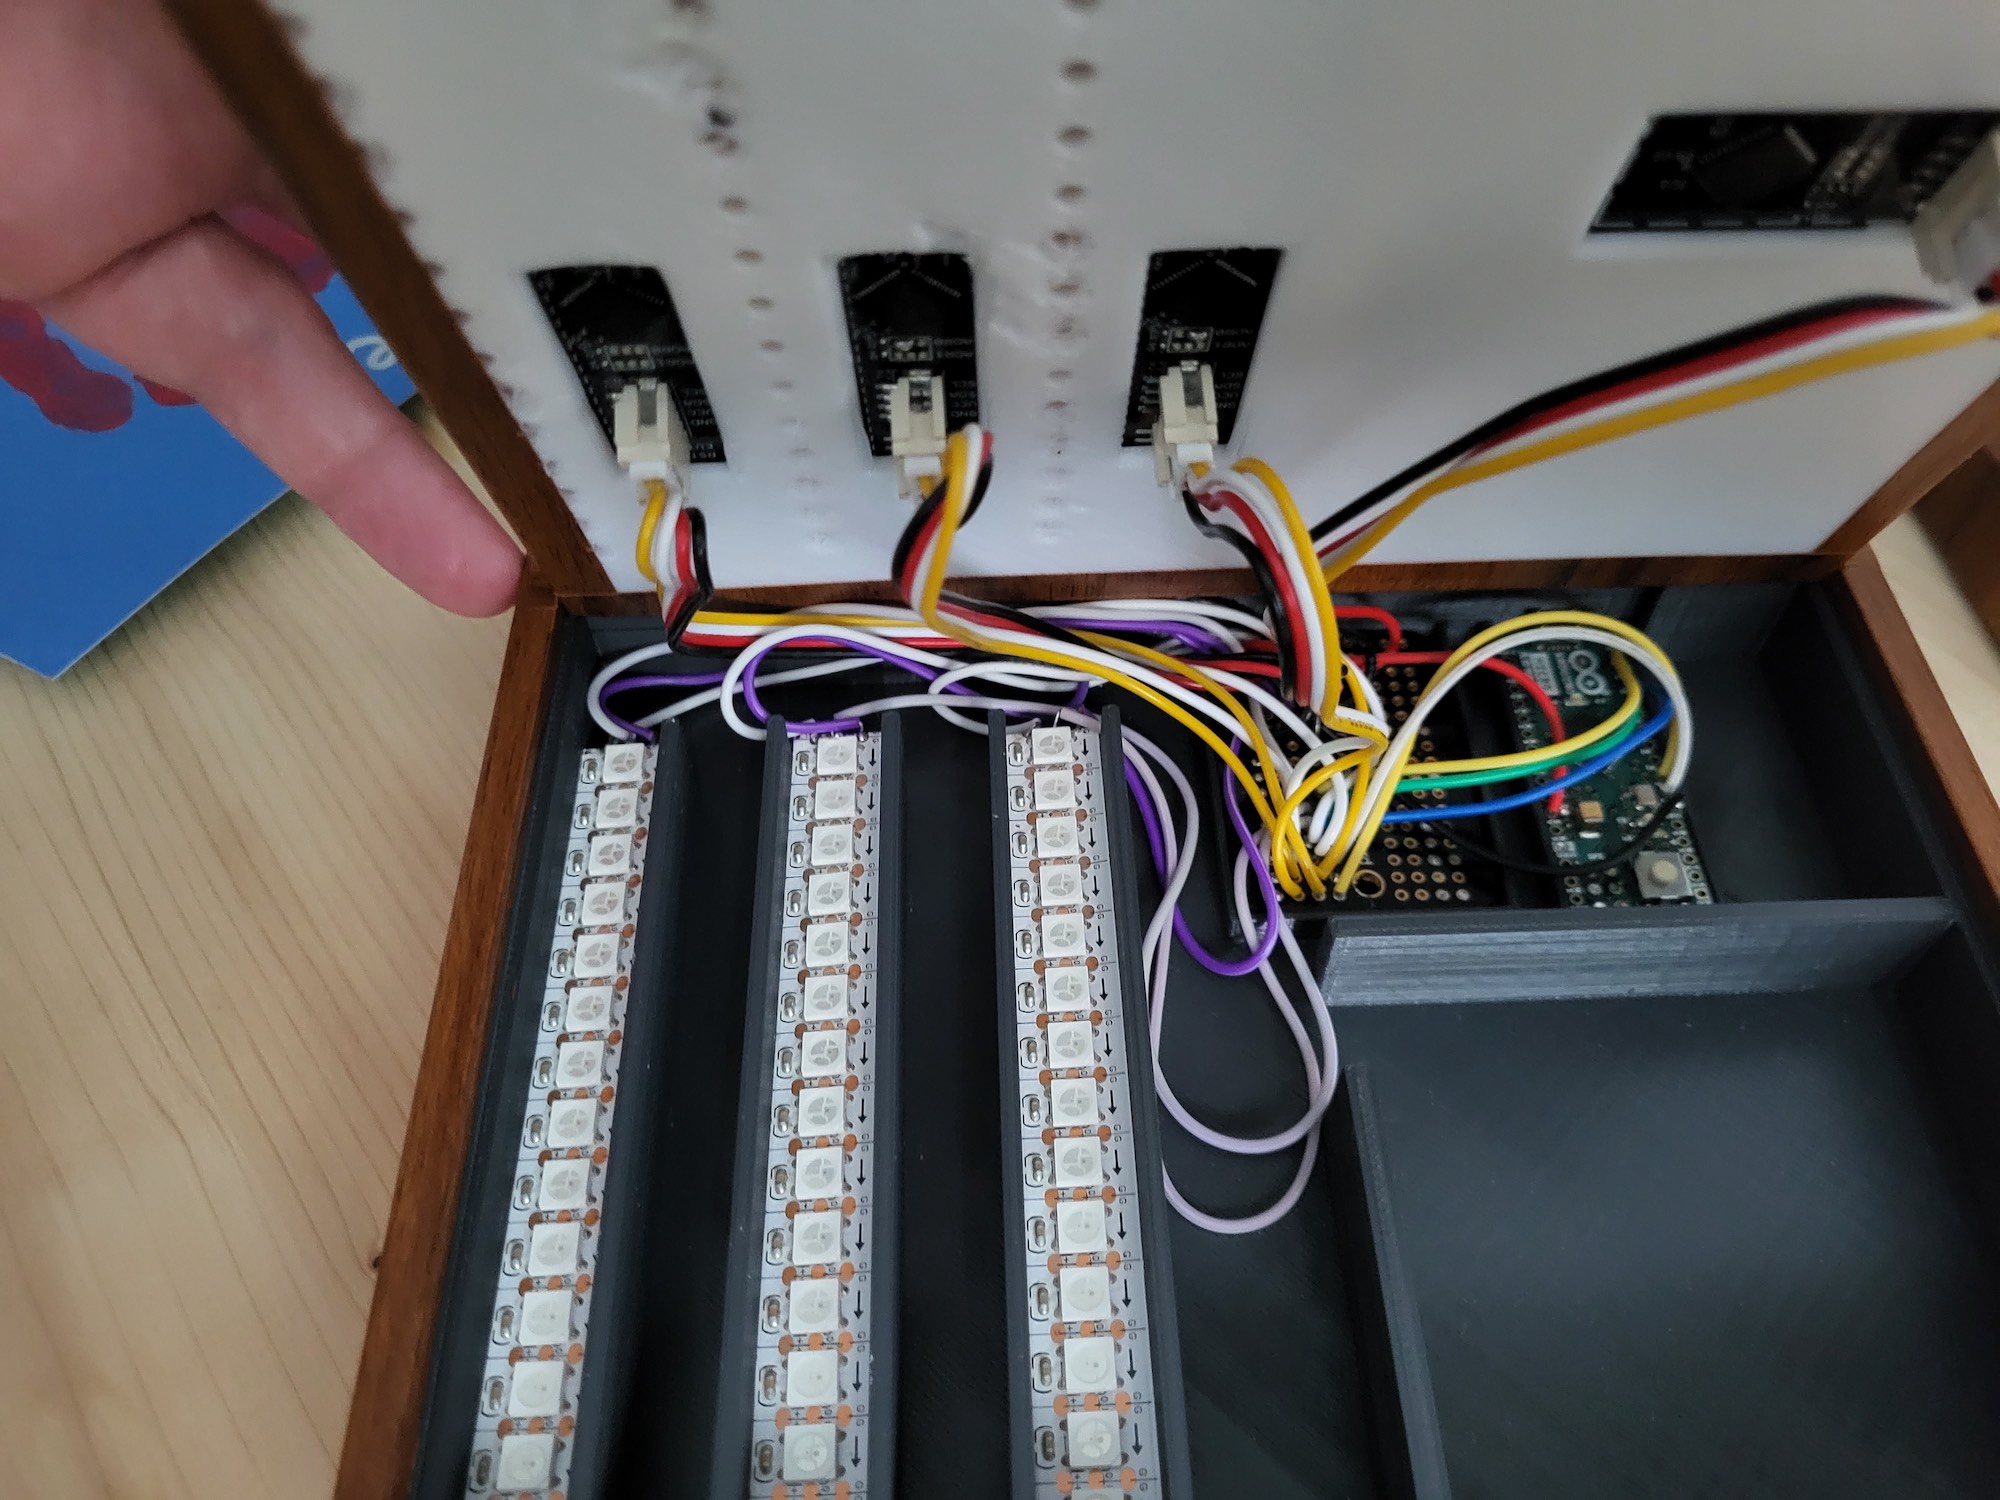
The insides of the controller housing the LED strips, trill flex sensor and the XIAO Seeeduino microcontroller.
The sensor readings are mapped to MIDI messages as follows:
- 3 faders for VST parameters (Modulation, Expression, Vibrato)
- 1 Fader to control selected track level
- Button for Start/Stop
- Button for Arm Recording
- Button for Mute selected track
- Button for Solo selected track
Here’s a video of them in action:
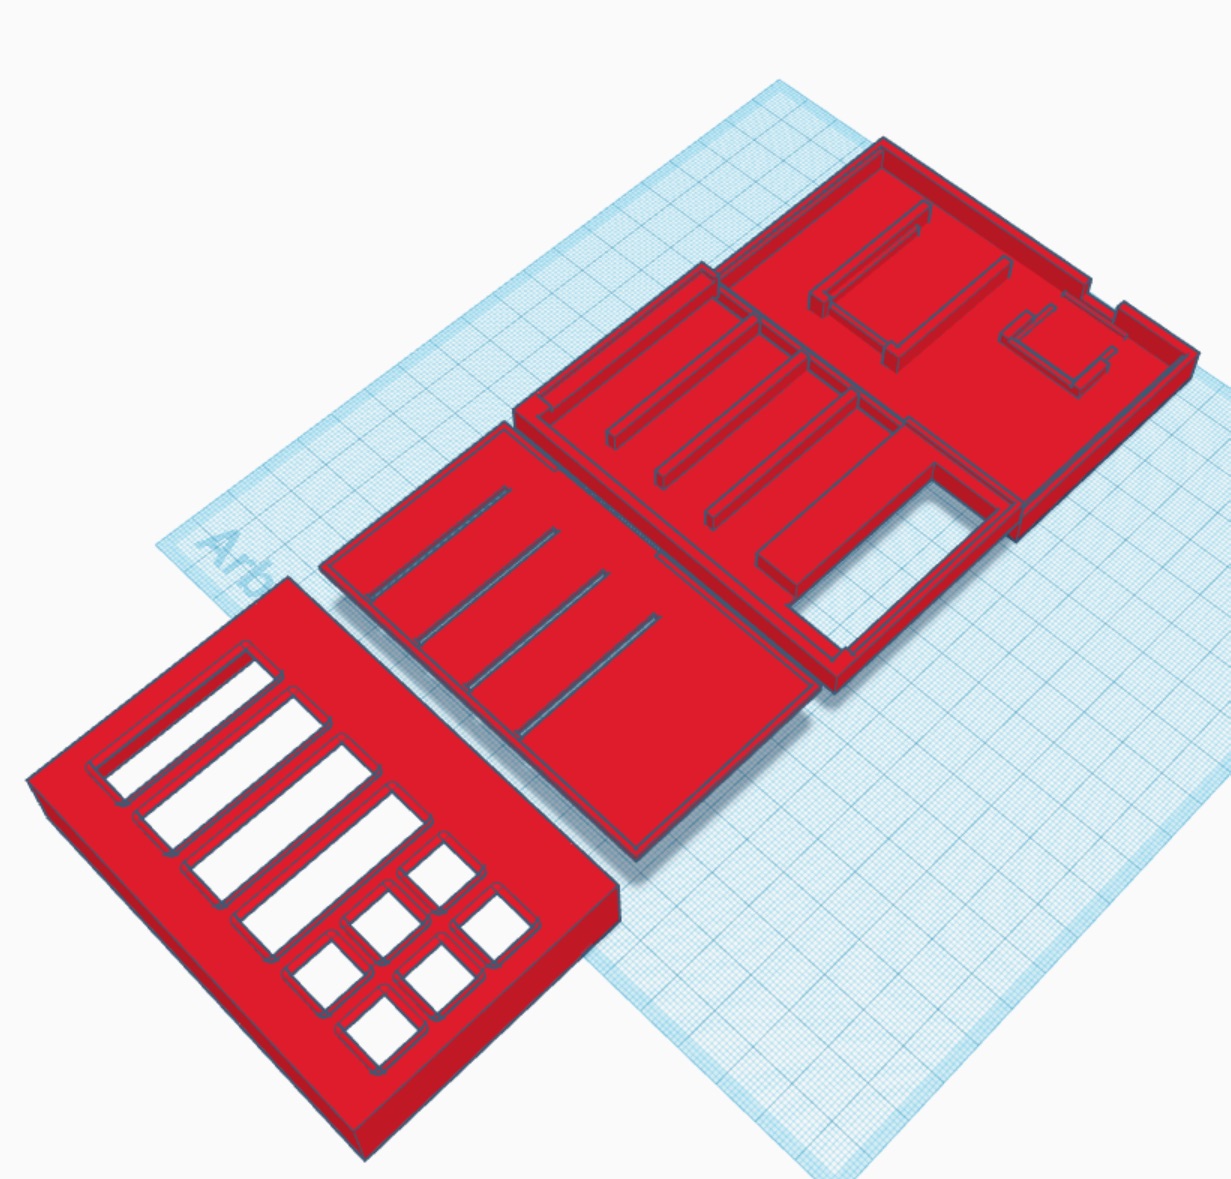
3D printed case
With a newly designed case which was 3D printed this revision is much more compact and all runs on the truly tiny microcontroller XIAO Seeeduino. Note that this board needs a couple of additional pull-up resistors to work with the Trill sensors.
Philipp has yet another design in the pipeline which we’ll be sure to feature once complete.
Trill Flex: a sensor in two parts
Our Trill Flex sensors have two components: a base that holds the sensing electronics, and a touch sensor printed on flexible PCB. Every Trill Flex ships with a one-axis multi-touch bar sensor that connects to the base with a clip connector.
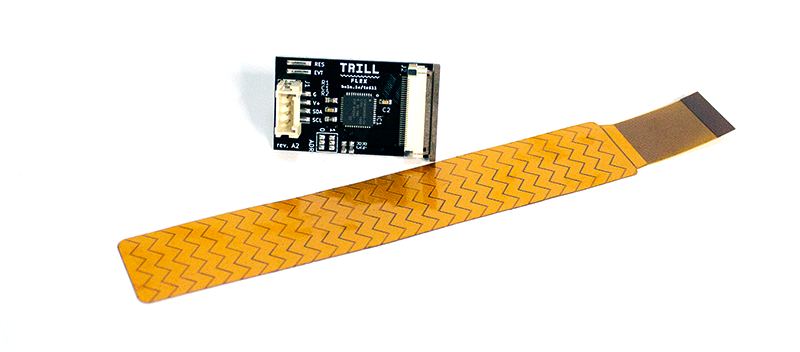
Trill Flex showing the two separate parts of the sensor.
As Trill Flex’s included sensor is detachable you can swap it out for a flex sensor of your own creation to fit your unique project, like Philipp has in this DAW controller.
Want to learn how to design your own flex sensor? We’ve created a step-by-step tutorial for learning how using KiCad in the video above. You can read the tutorial on our Knowledge Base.
About Philipp Noertersheuser
Philipp Noertersheuser in his home studio.
Philipp Noertersheuser is a sales engineer by day and hobby musician by night (when his kids leave him some time). He has played various instruments for more than 30 years in different bands mainly of the genres metal and rock. He fondly remembers the time when PC recording ended at 8 tracks because the PC ran out of computing power! For the past few years he has been experimenting in orchestral composition and wanted to create a controller that would help his current workflow.
Thanks to Philipp for sharing this project with us.