Making E-Textile Interfaces with Trill Craft
Bringing beautiful touch sensing to soft circuits
The world of e-textiles and smart fabrics is developing at a fast pace and now more materials than ever are available for makers and hobbyists to experiment with. In our latest video Becky Stewart gives a tutorial on making e-textile interfaces.
Working with conductive thread and fabric
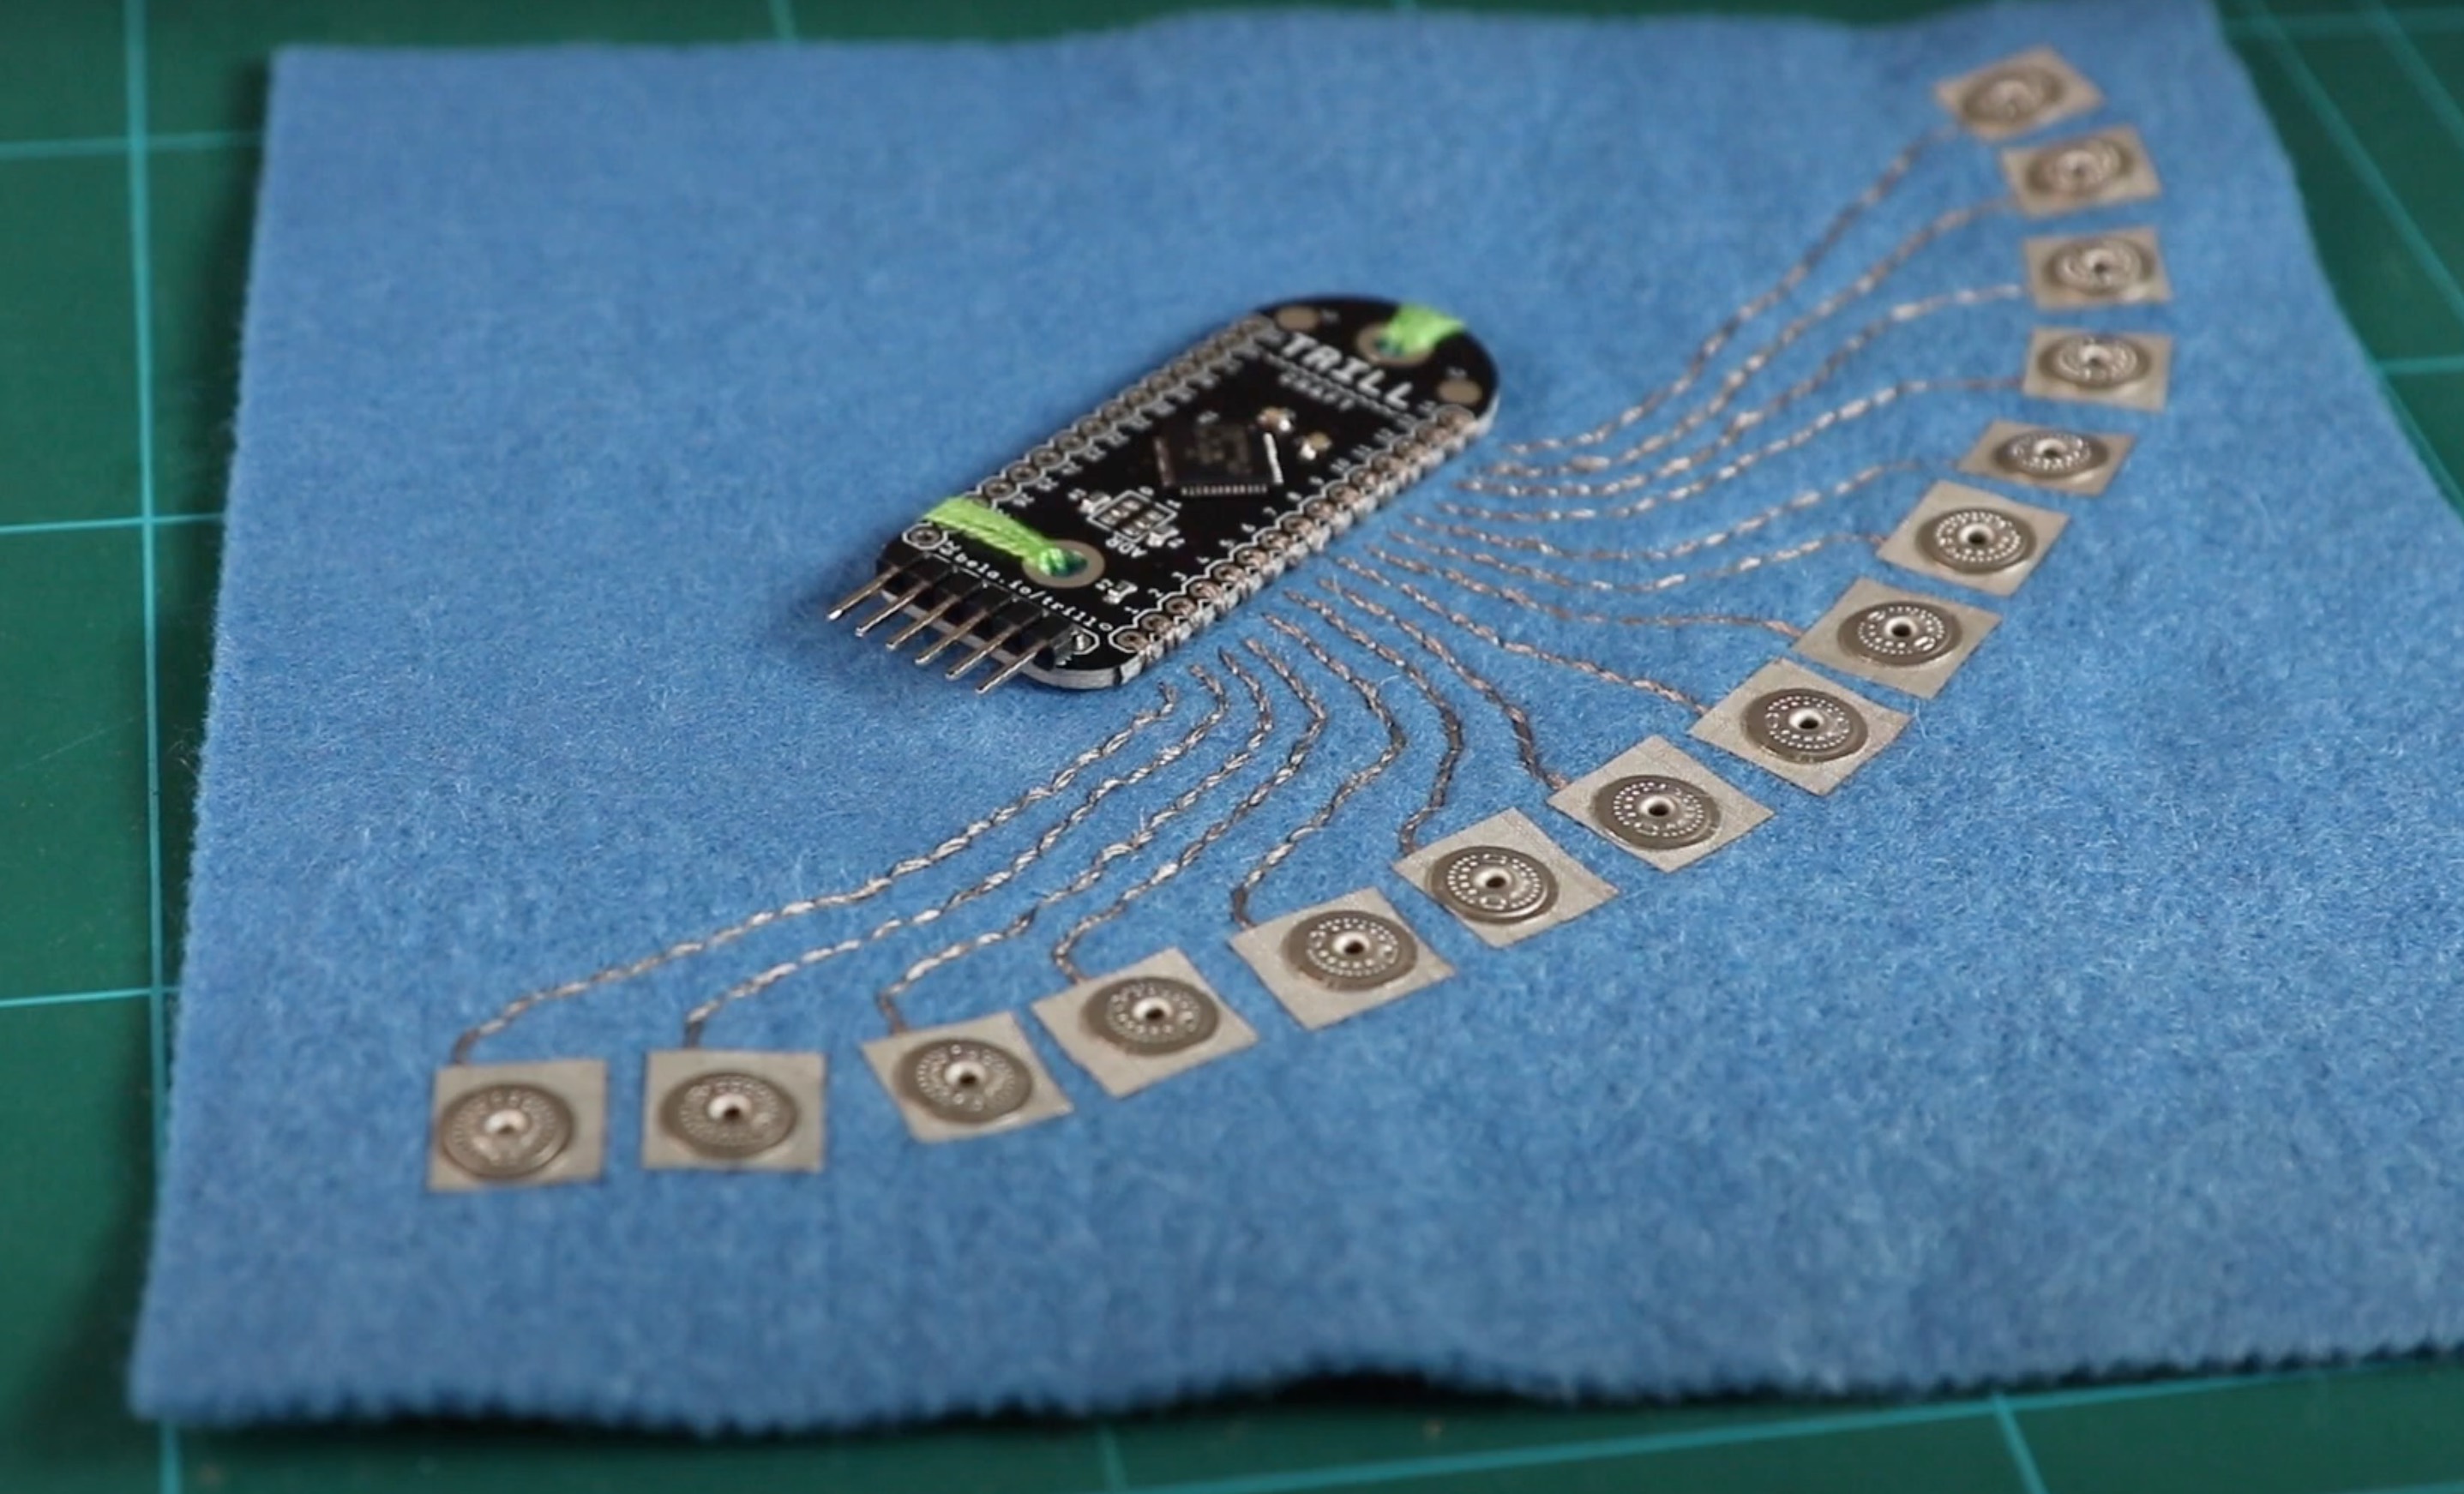
Trill sensors make adding capacitive touch interactions to any project incredibly simple. You have a lot of different options with the different shapes like Trill Square or Trill Ring which use the same sensing chip and processing, just with the sensor electrodes in different configurations. Trill Craft is different from all the others in that it doesn’t have pre-made electrodes — or at least it’s designed expecting that you would add on your own.
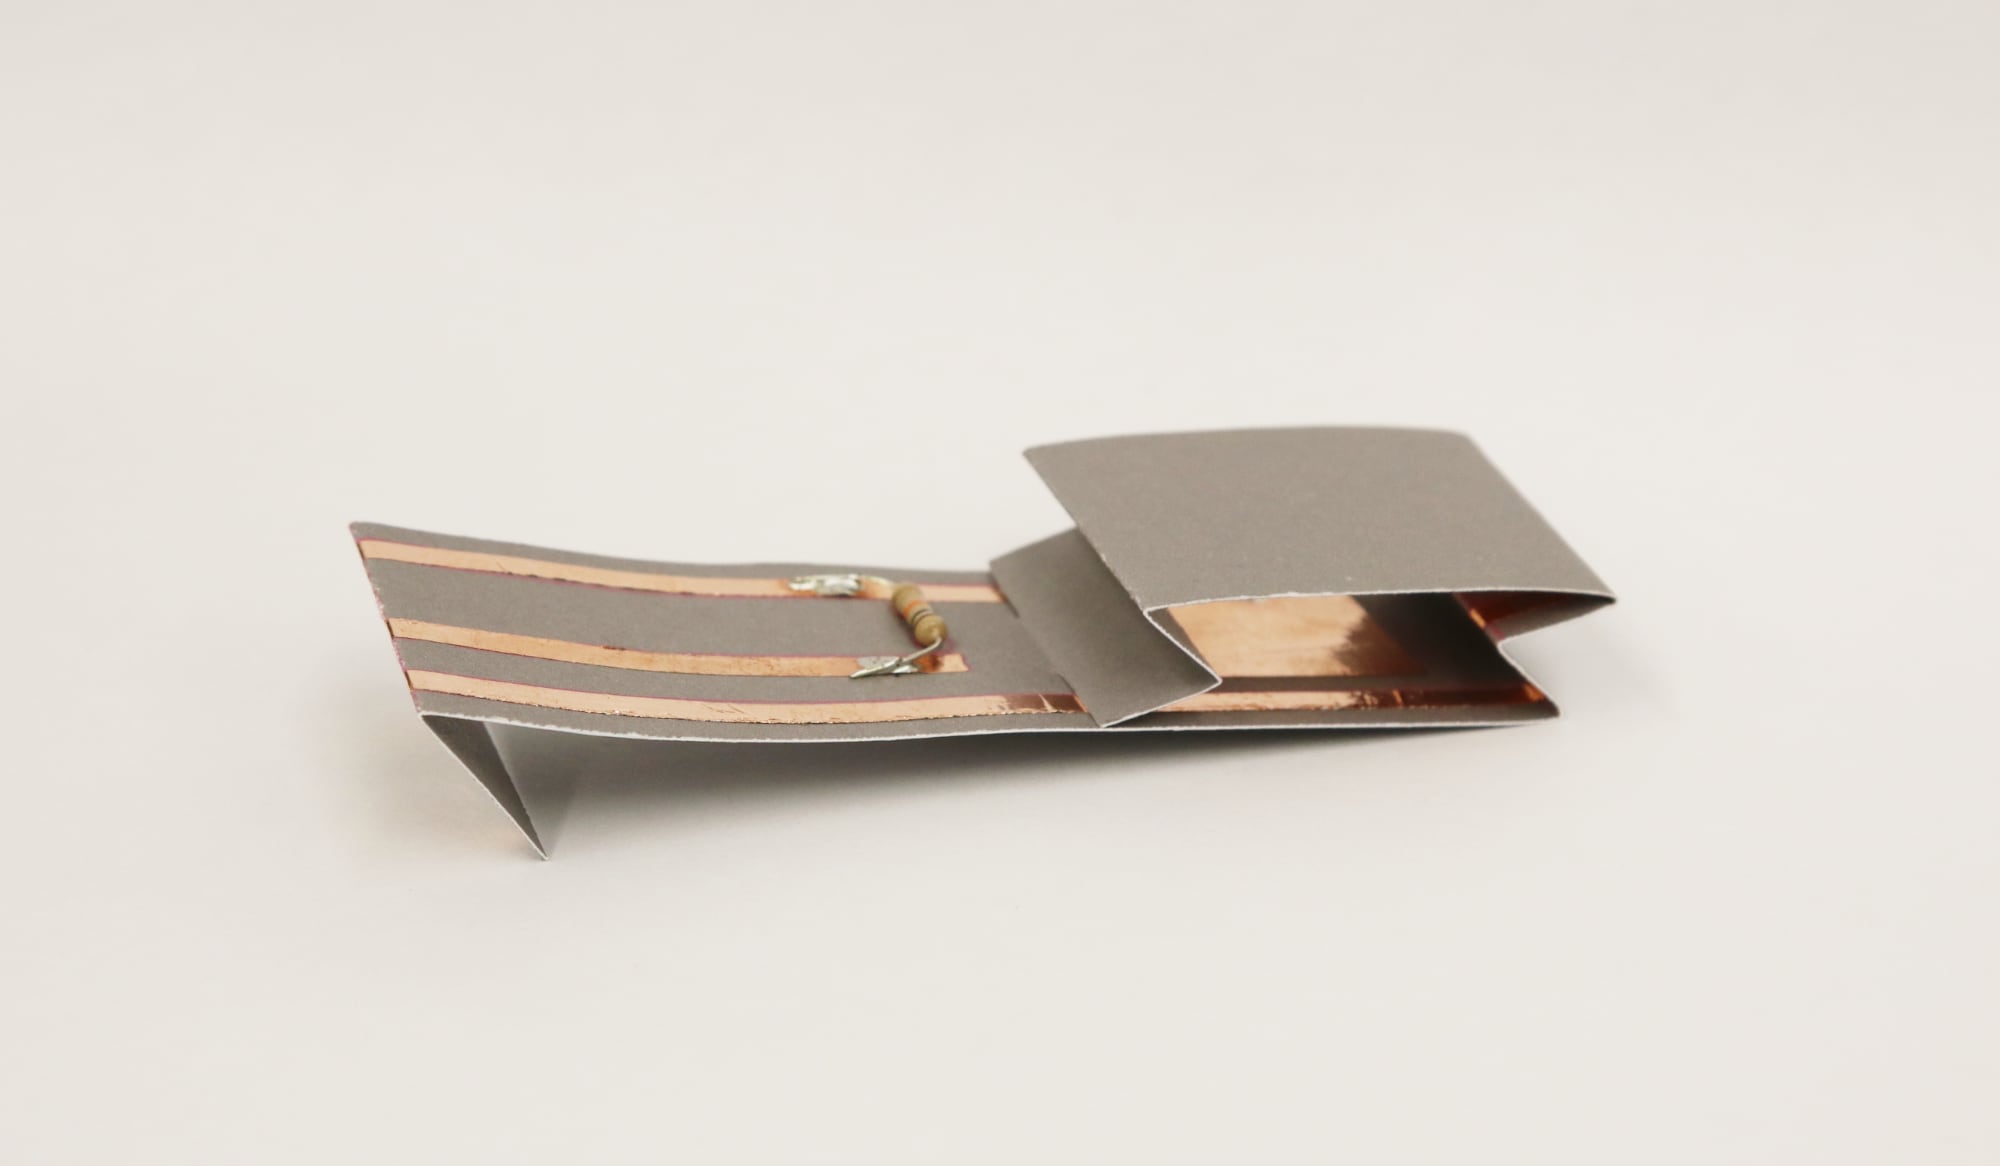
This means you can break free from PCBs and work with other materials like conductive textiles or paper circuitry. However, it can be deceptively difficult to figure out the best way to connect a PCB like the Trill Craft with a flexible material like paper or fabric. In this video we go through one way you can build robust electrical connections between the Trill Craft PCB and an e-textile circuit to create a fabric breakout board.
What the tutorial covers
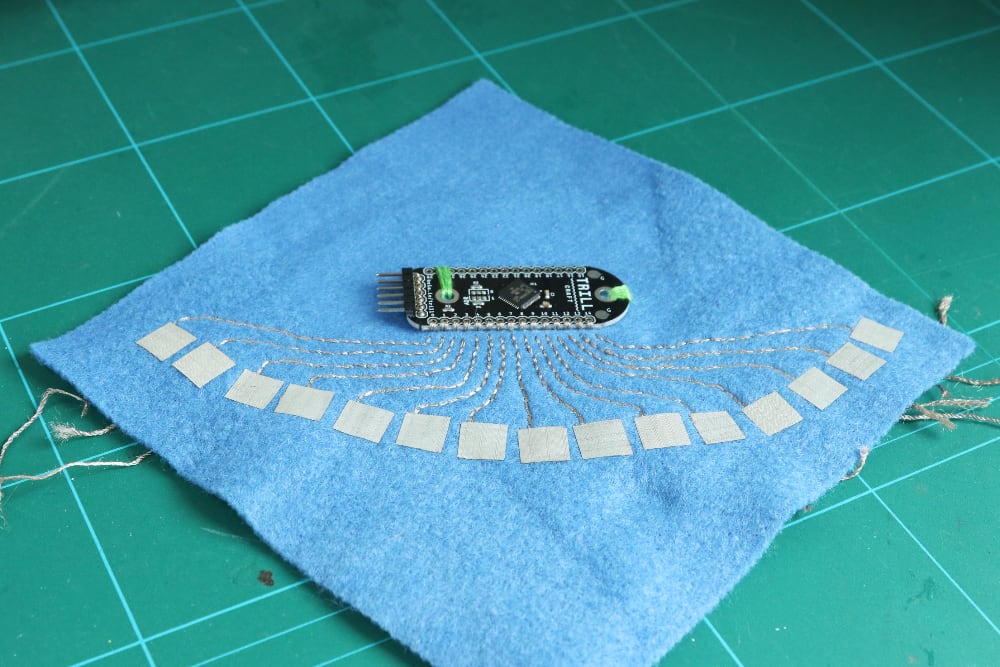
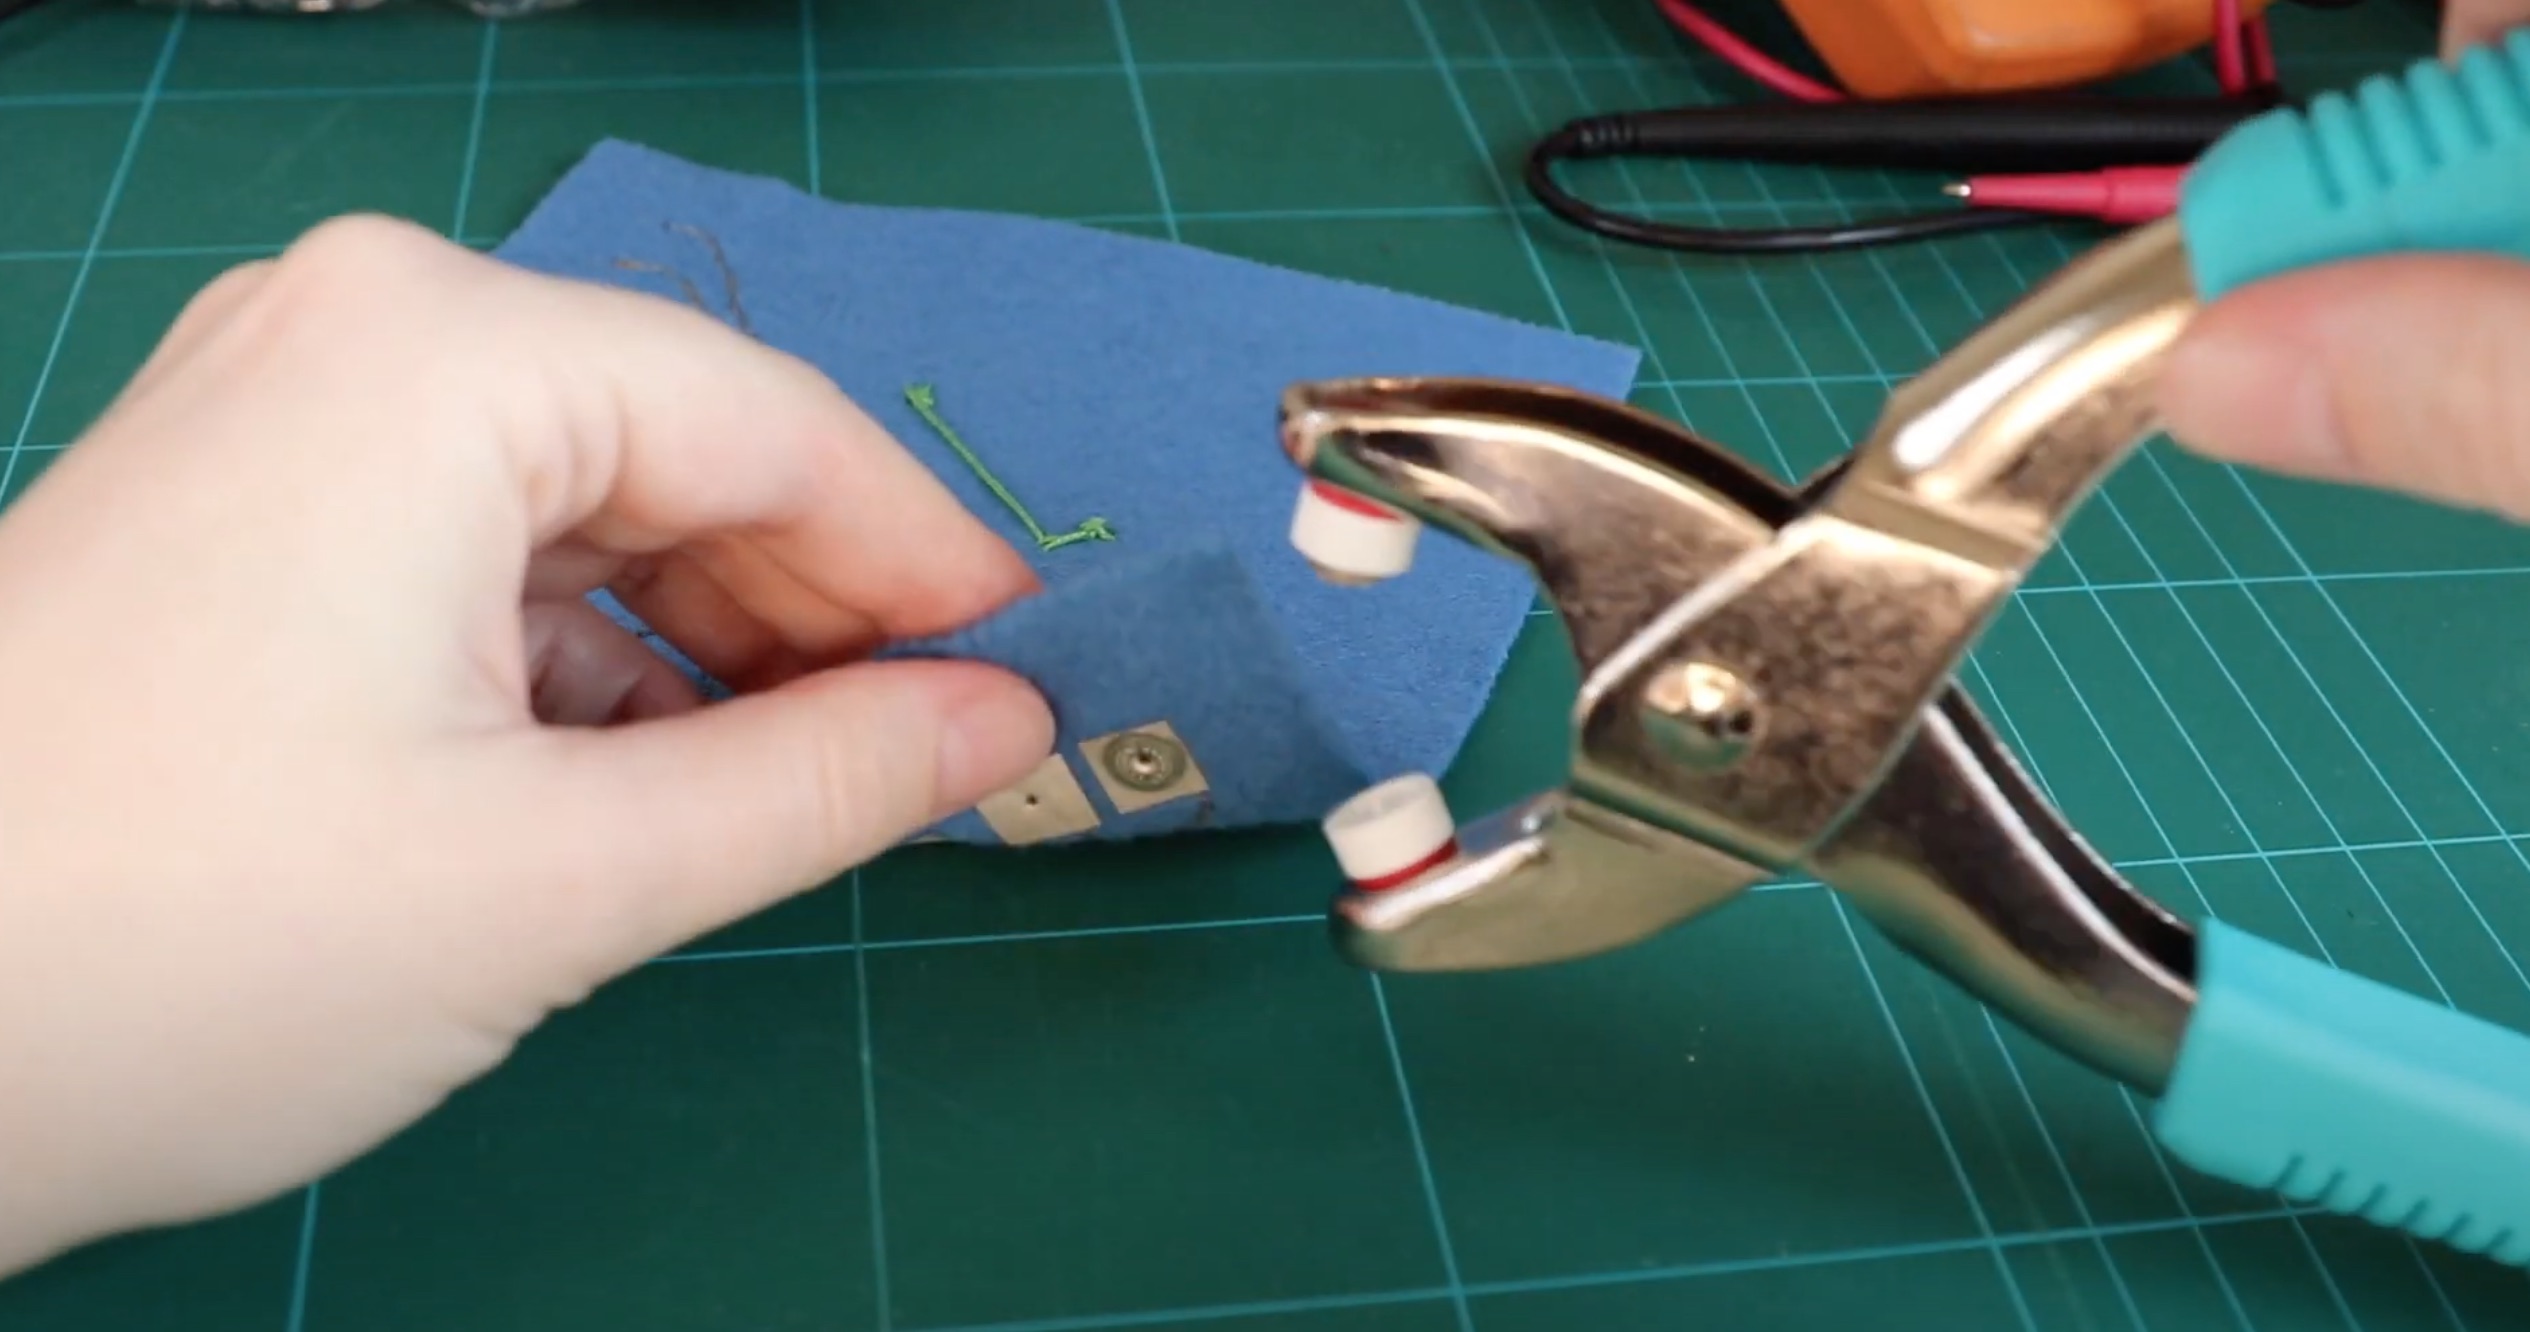
Let’s sum up what we’re going to do really quickly, we’re going to use conductive thread to sew an electrical trace away from the Trill Craft PCB. We’ll cover the ends of that sewn trace with a conductive fabric pad, and then place a press-fit snap onto that fabric pad to provide a non-permanent electrical contact point so that we can attach and detach our Trill Craft from a larger touch interface. In the video we go through each of those steps in a bit more detail.
Materials used in this tutorial
Felt or other base fabric
You’ll need a base fabric that isn’t conductive to act as your substrate holding the whole circuit together. I like working with felt as you don’t need to treat the cut edges at all to keep the fabric together. Choose whatever fits your project the best.
Conductive thread
You will need some conductive thread. Exactly which thread you use is not essential. You’ll want a thread that is easy to handle when hand sewing without fraying too much, but that is also not too rigid as you need to thread it onto a needle small enough to pass through the PCB electrode hole. I’m working with a polyester thread that has been nano-plated with silver with an electrical resistance of about 40 Ohms per meter. It’s approximately the same weight as an embroidery thread.
- Electro-Fashion conductive thread from Kitronik
- Stainless Thin Conductive Thread from Adafruit
- Conductive Thread Bobbin from Sparkfun
Conductive fabric
You will also need some conductive fabric, but not very much of it. Only a square centimetre for each electrode you want to break out. It’s a good idea to always keep all offcuts and scraps as this is when then come in handy. I’m using a conductive ripstop fabric.
- Electro-Fashion conductive thread from Kitronik
- Stainless Thin Conductive Thread from Adafruit
- Conductive Thread Bobbin from Sparkfun
Iron-on adhesive
We won’t be sewing the conductive fabric, instead we’ll be bonding it. Get some iron-on adhesive — but not iron-on interfacing. You just want the sheet of glue. You’ll apply this to one side of your conductive fabric. I like to do this with a whole sheet of conductive fabric and then cut the fabric into the needed shapes later.
Button snaps
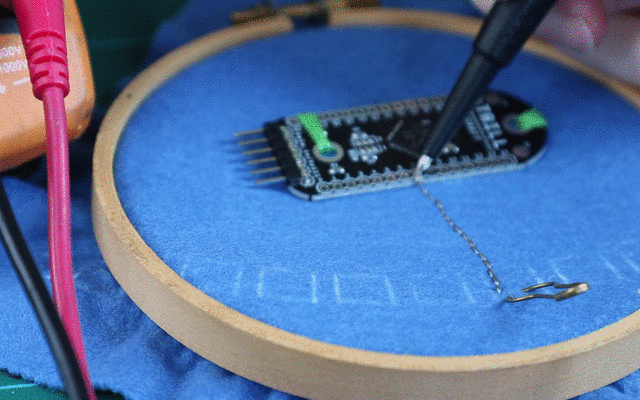
The last of the haberdashery items are snaps. The 8mm mini-snaps by Prym are the smallest diameter press fit snaps I’ve found. You’ll want to avoid sewn-on versions unless you really like to sit and spend too much time sewing on snaps. And make sure you buy ones that are not coated, but are bare metal. It’s always a good idea to do a continuity test with a multimeter to make sure the surface is conductive.
Trill Craft
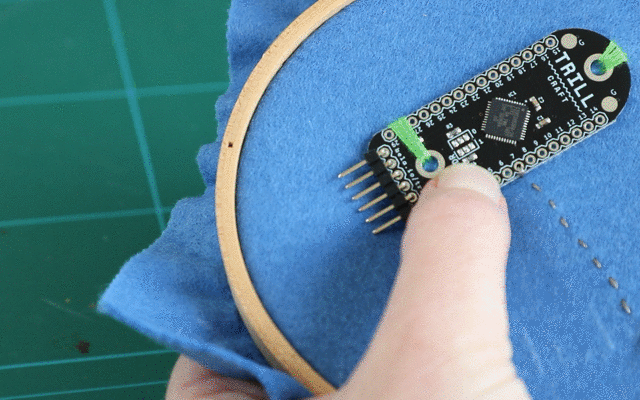
And last but certainly not least you’ll need a Trill Craft. It comes without any headers soldered on, but does come with right-angle headers you can solder onto the I2C connection of the board. If you plan to use these headers or solder on any other connector, do that first before you go any further. I’ve soldered on the right-angle headers so that I can connect the Trill Craft to a Bela Mini.
Template
It’s helpful to work out the layout of your fabric breakout board digitally. You can download the template used here from the link below and open it in Inkscape or Illustrator. You can also design your own starting with the footprint of the Trill Craft using the PCB files provided by Bela. Open them in KiCAD and export any design to another image format.
Print out your template and cut out where the fabric pads and the Trill Craft will be placed. Then using tailor’s chalk trace the template onto your fabric. For this project we’ll only breakout the first 15 electrodes, but there’s nothing stopping you from adding the other 15 as well or changing the layout.
Find out more
On the Bela blog we have discussed similar topics in previous post for example we have looked at e-textiles and wearable sensors and how they can be used with Bela for designing embodied sonic interactions.
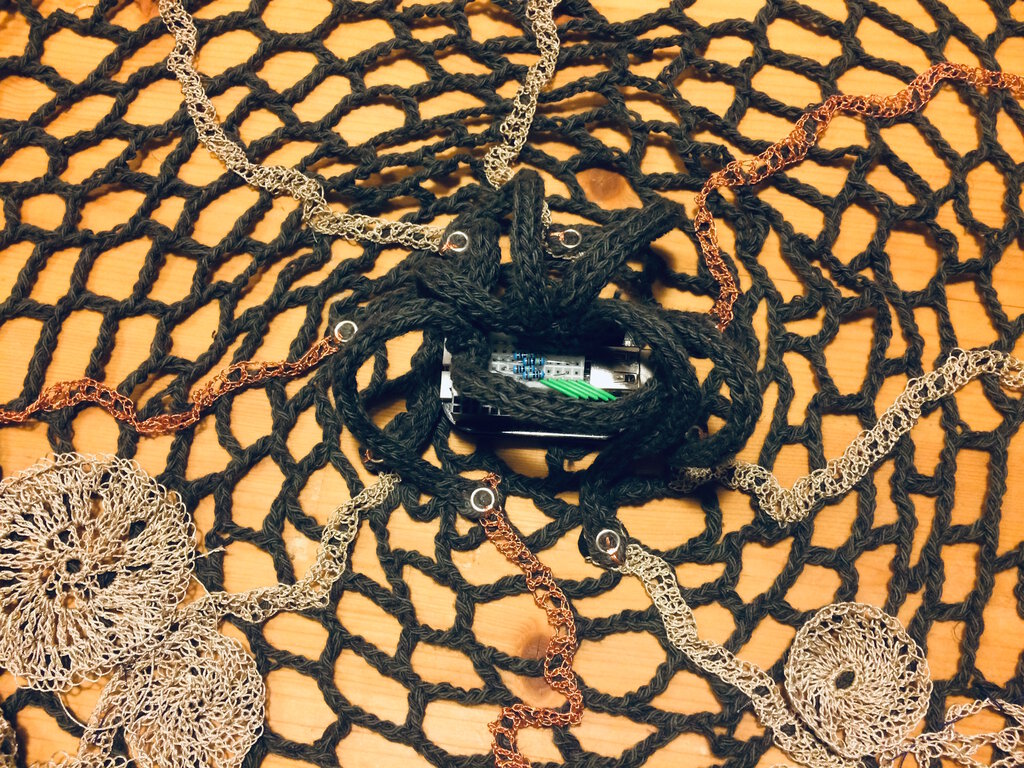
Mika Satomi from Kobakant has also contributed a post on working with a crochet blanket with exposed conductive pieces so skin resistance can be used to play musical notes by touching different parts of the blanket.
Most recently we have launched the Embelashed toolkit for working with paper sensors.