Trill Guitar
Building a MIDI instrument with the Pi Pico and our Trill touch sensors
Ever wanted to created your own touch sensitive MIDI guitar? In this post we summarise at a four-part tutorial series which guides you through the necessary steps to build your very own MIDI instrument using a Raspberry Pi Pico and our Trill touch sensors.
Cheap Trills!
Over the past few months Mike Cook has been putting the Trill sensors through their paces in his monthly series called “Cheap Trills”. In this post we have summarised some of Mike’s brilliant work and focus in on the Trill Guitar, but we highly recommend having a look at the original features in MagPi magazine which have much more detail on the builds. The full tutorials can be found in issues 102, 103, 104, and 105 which are all freely available as .pdf downloads.
Trill and Raspberry Pi
In Part 1 of this tutorial series Mike comes to terms with the Trill sensors and even goes to the lengths of contributing a Python library specifically for working with them.
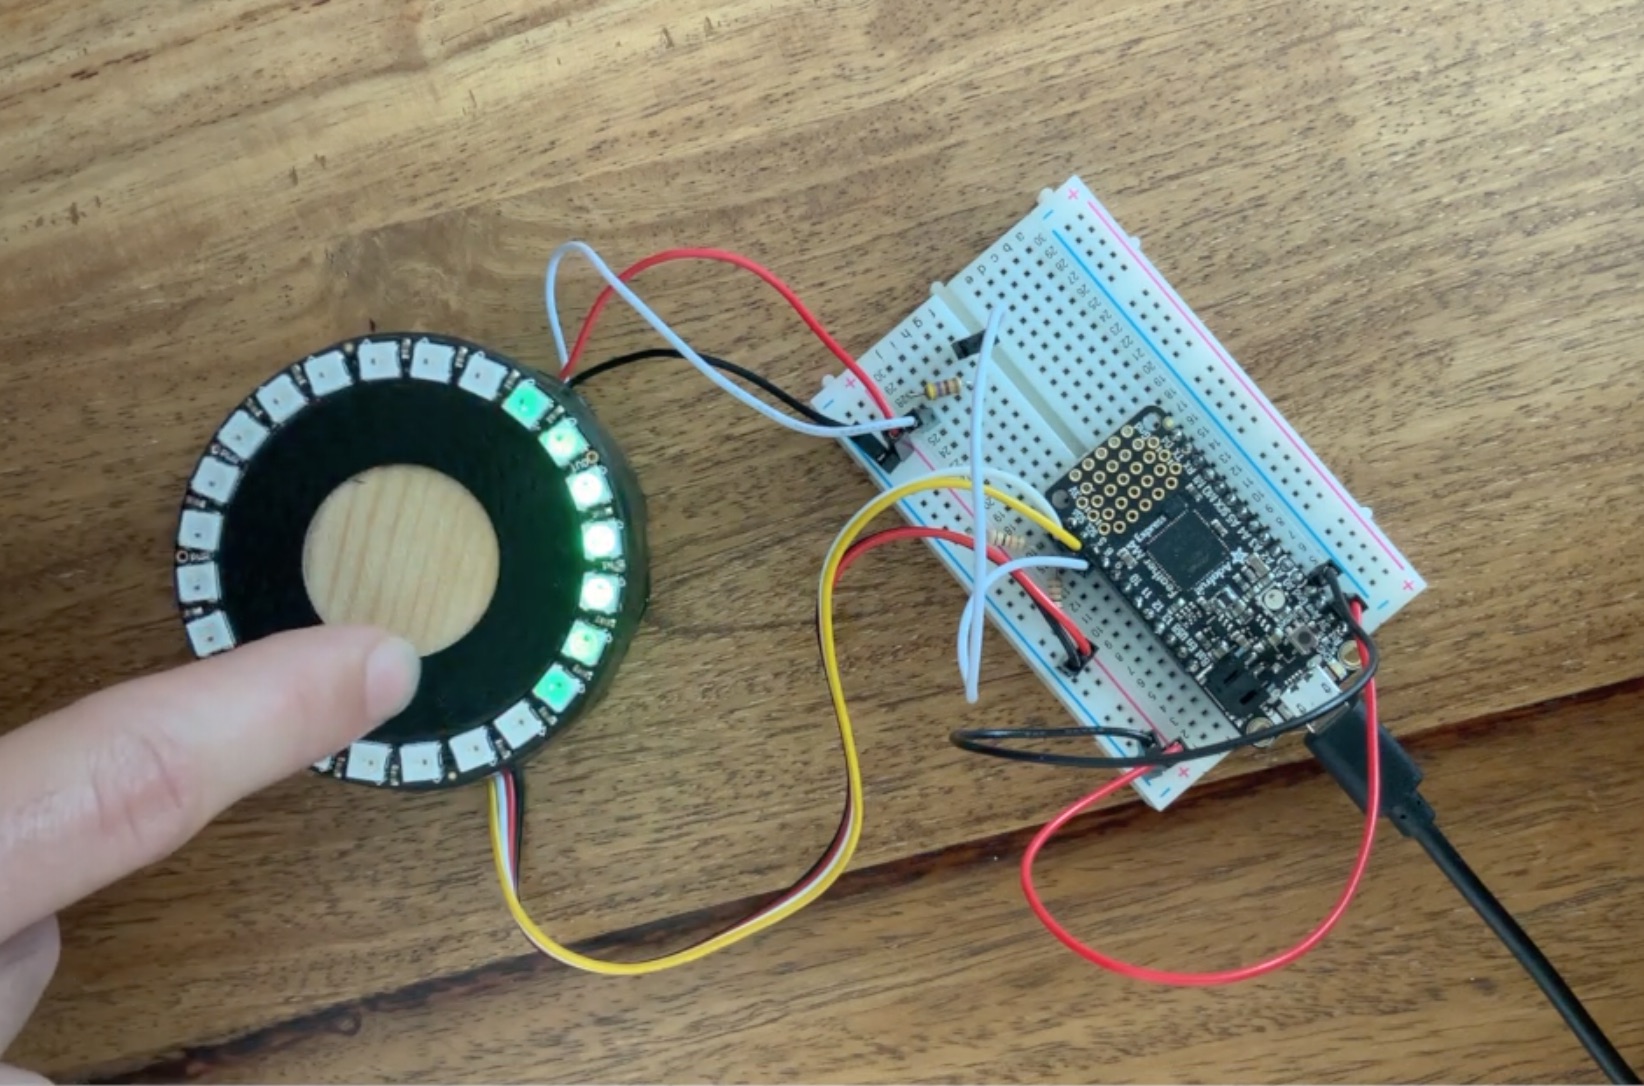
Connecting a Trill Square to a Raspberry Pi.
Trill Touch Sensors
For the Touch sensor part of his guitar Mike decided to use our Trill touch sensors which we launched on Kickstarter. They come in a variety of shapes: bar, ring, square, hexagon, and a DIY craft version. We even now have a flexible version of this sensor. They can detect not only touch positing on the sensor, but also multiple touches at once and how hard the person is touching on the sensor.
Python Library for Trill
The Trill sensors ship with a C++ library for Linux embedded computers and Arduino-style microcontrollers but Mike wanted to design his instrument in his favourite language, Python. He very generously contributed a Python library which will run on a Raspberry Pi and simplifies interacting with the sensors. You can find the library here.
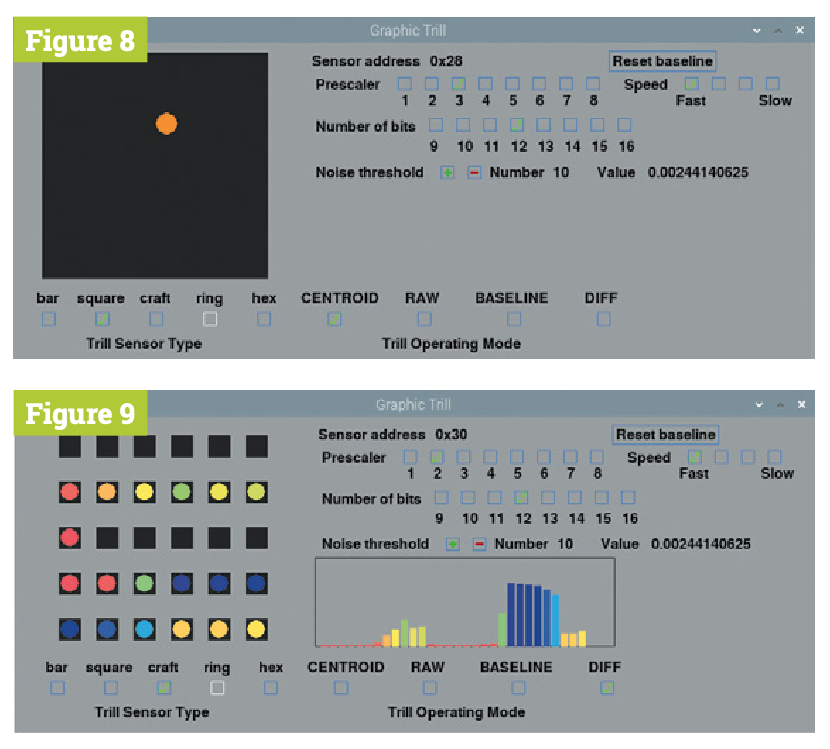
Mike's Python interface for the Trill sensors. A single touch on the Square Trill sensor in the CENTROID mode is shown in Figure 8. In Figure 9 a double touch for a Craft Trill sensor in the DIFF mode is shown. First featured in the MagPi magazine 102.
Raspberry Pi Communicating with Trill
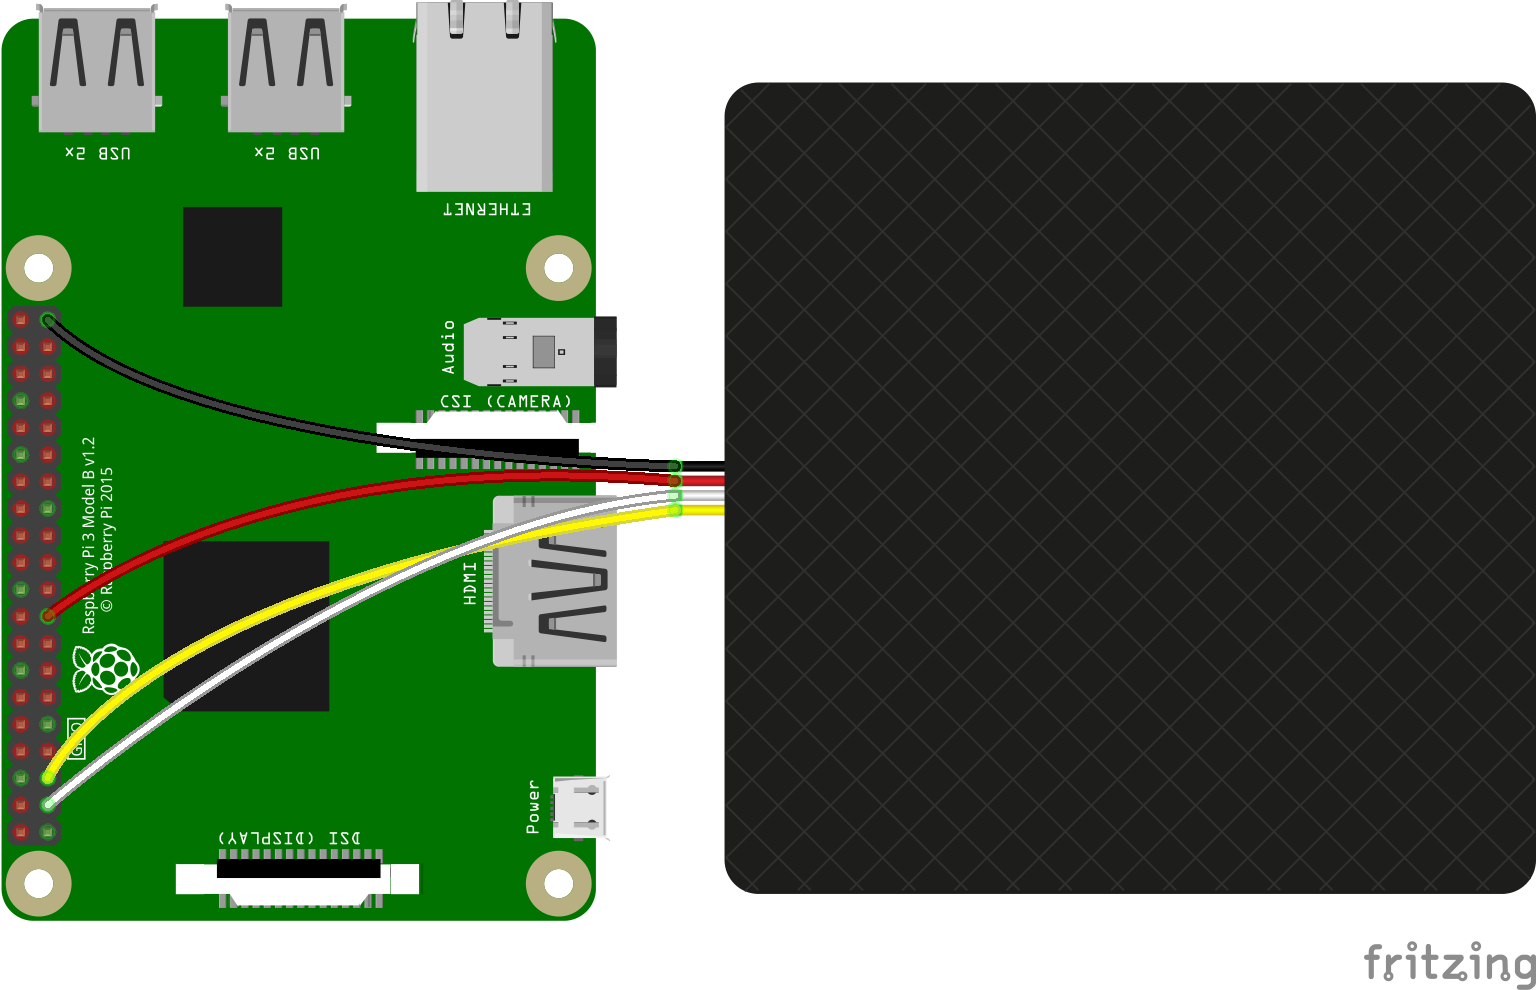
To get the Python library up and running on a RaspberryPi it is necessary to connect the Trill sensor to one of the two I2C ports available. Note that if you are using the I2C bus 0 then you will need to add in a pullup resistor of around 1K8 Ohms. Mike created a bus to connect multiple Trill sensors together, similar to our Trill Hub.
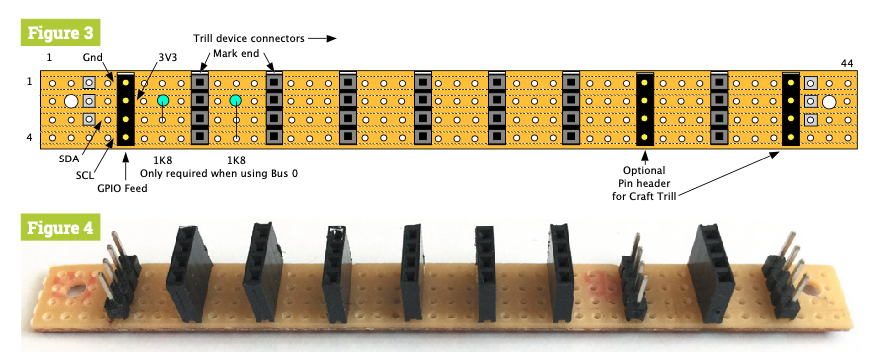
The physical layout of the I2C expander board and a photograph of I2C expander board. First featured in the MagPi magazine 102.
Mike also created various test programmes which can be run in on your Raspberry Pi in Python and will print or visualise the readings from the sensors. For a detailed explanation of how to get the Trill sensors working with your Pi check out MagPi magazine issue 102.
Exploring applications of the Trill Sensors
In number 103 of MagPi Magazine Mike explored three use cases of the Trill sensors with the Raspberry Pi including a specialised mouse, juke box and music box.
When using complex pieces of software such as 3D modelling or video editing programmes it can be extremely useful to have a smart mouse controller which is dedicated to specific tasks that are done frequently or require a specific type of control. Mike explored some different mappings of position to control action which work when treating Trill Ring as a smart mouse. Next Trill Ring was explored as a way of selecting from a bank of music tracks.
The final project in issue 103 uses Trill Ring as a means of controlling a digital music box. As the finger moves around the sensor notes are triggered in a manner similar to twisting the handle on a mechanical music box.
Creating the Trill Guitar
With the arrival of the Pi Pico on the scene, Raspberry Pi’s new super cheap microcontroller, Mike decided that it would be a perfect opportunity to try out the board in combination with the Trill sensors.
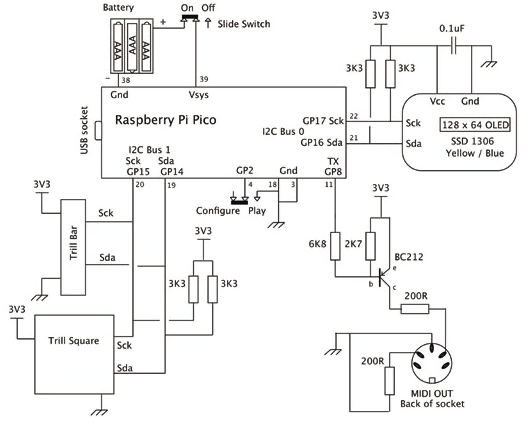
Schematic of the Trill Guitar.
The Trill guitar consists of the following component parts:
- Trill Bar touch sensor for chord selection
- Trill Square touch sensor for strumming input
- Raspberry Pi Pico as the microcontroller brain
- An OLED display for display chord and song information
- A MIDI DIN output jack for connecting to MIDI hardware synthesiser
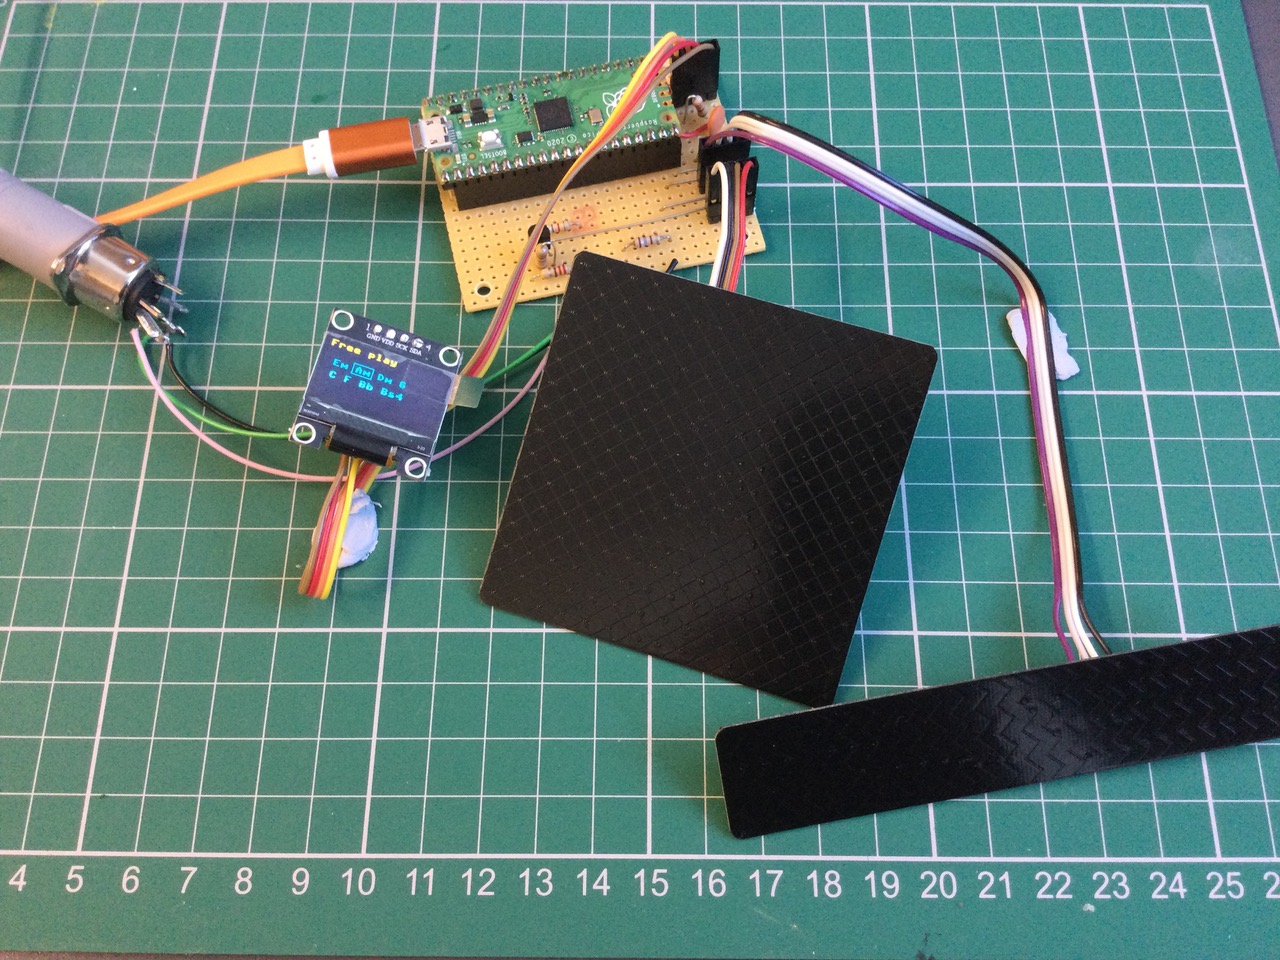
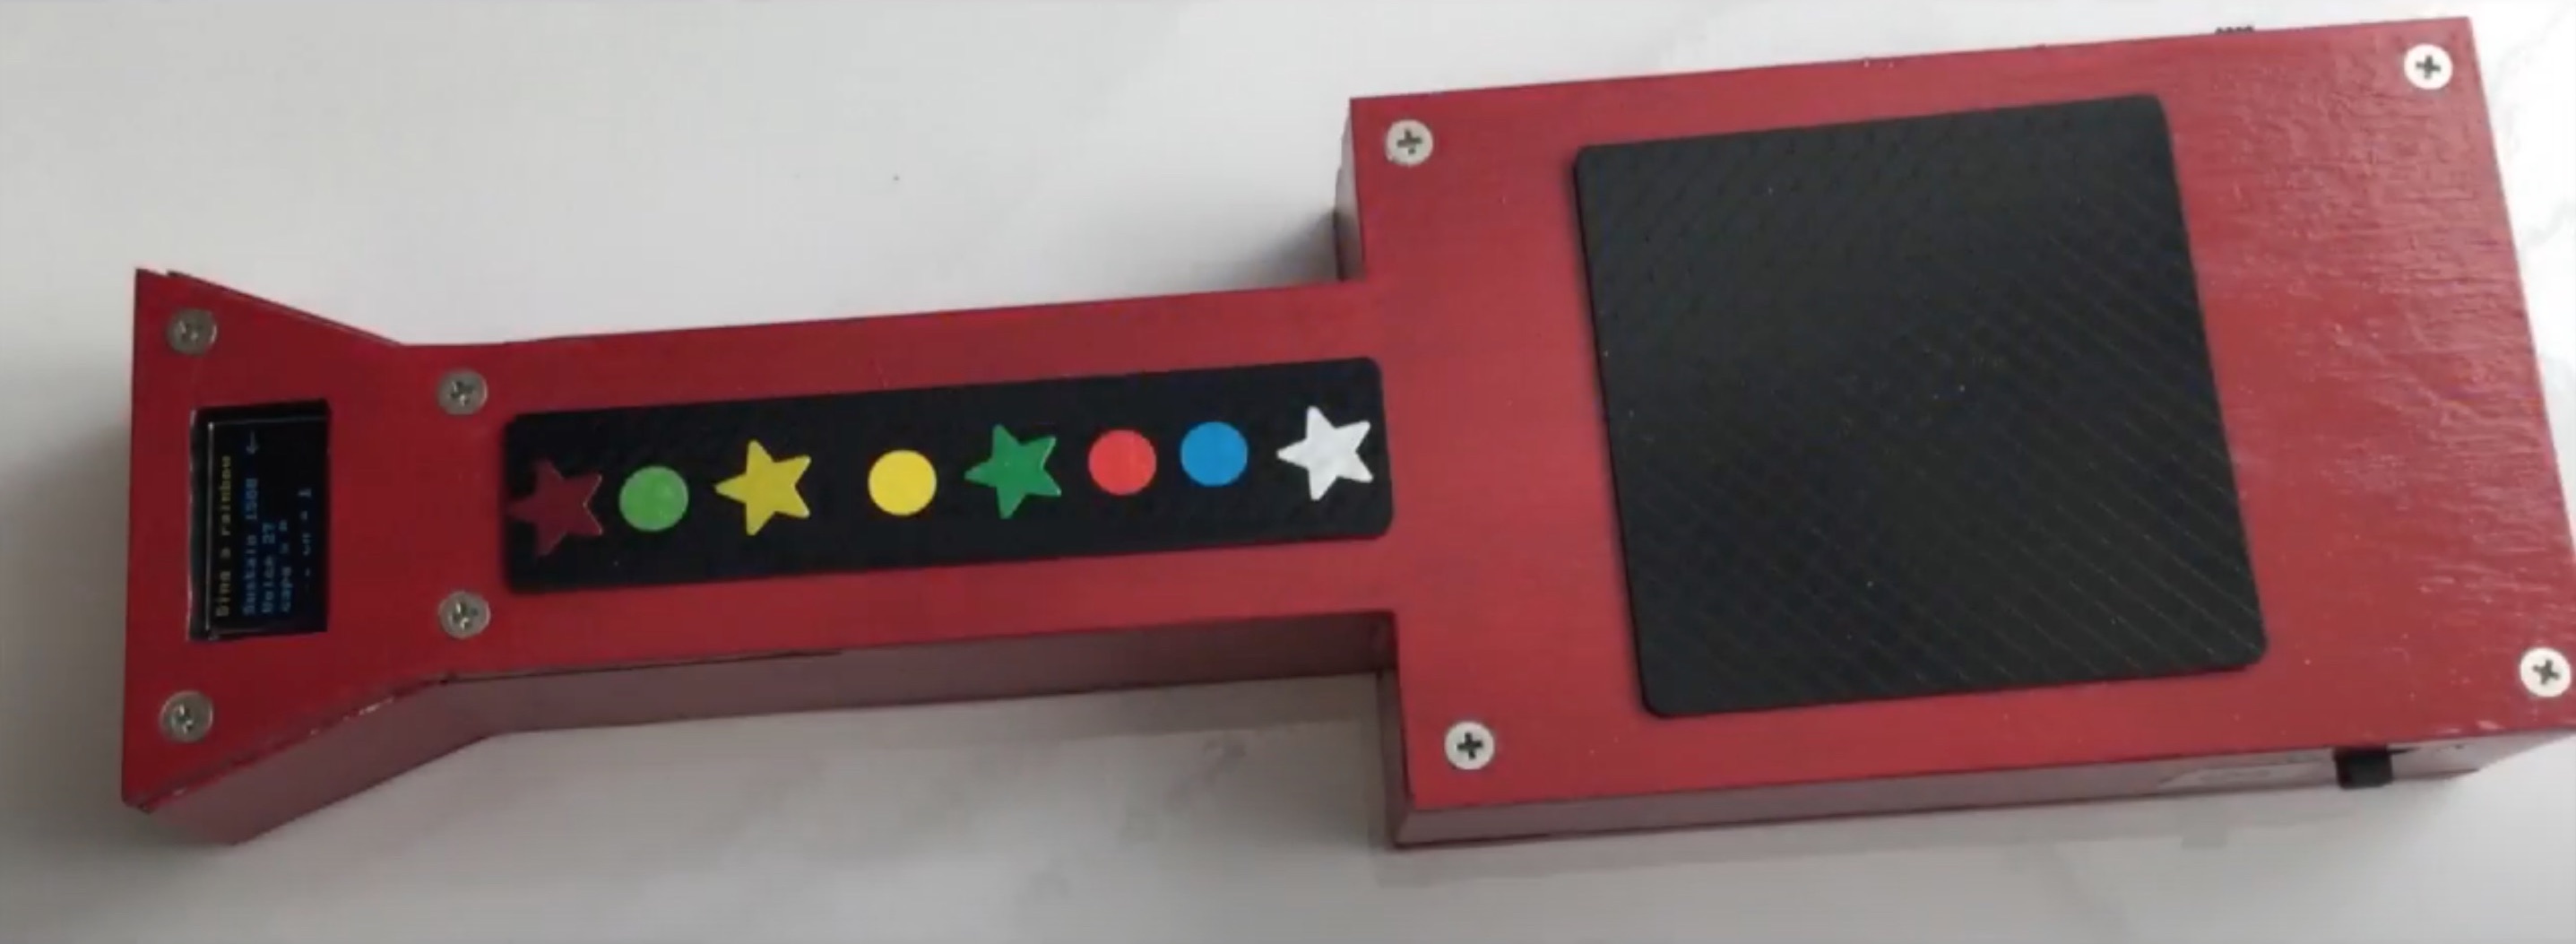
The components which make up the Trill guitar.
The body of the guitar was from hand cut from 3mm plywood and painted bright red. Mounting holes for the OLED and Trill sensors were carefully milled out so that they hardware sat tightly in the top surface.
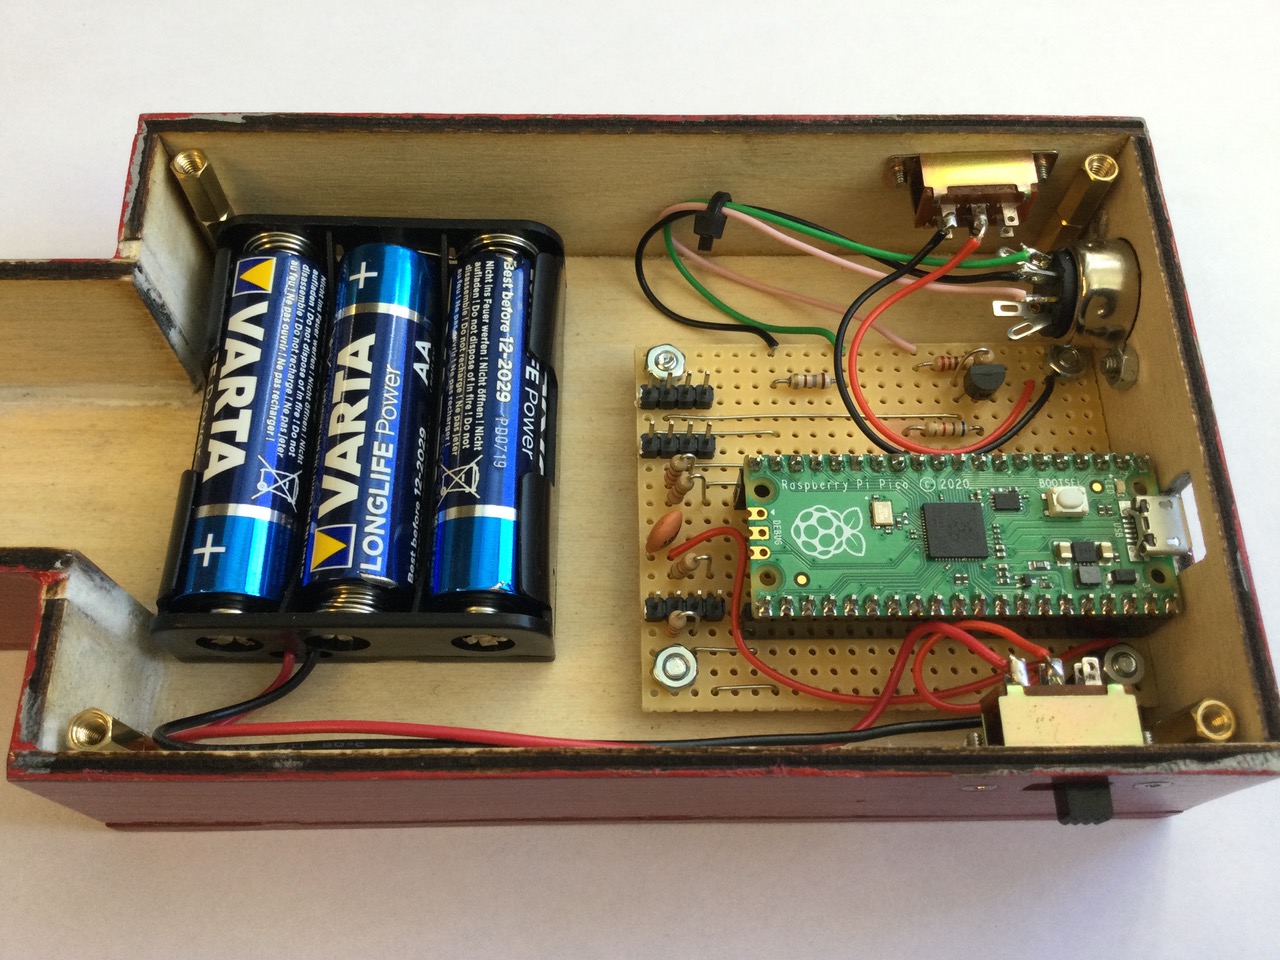
Components mounted in the body of the guitar
To play the guitar one strums across the Trill Square sensor. The height at which you strum determines the volume of the plucked note (the velocity of the MIDI note).
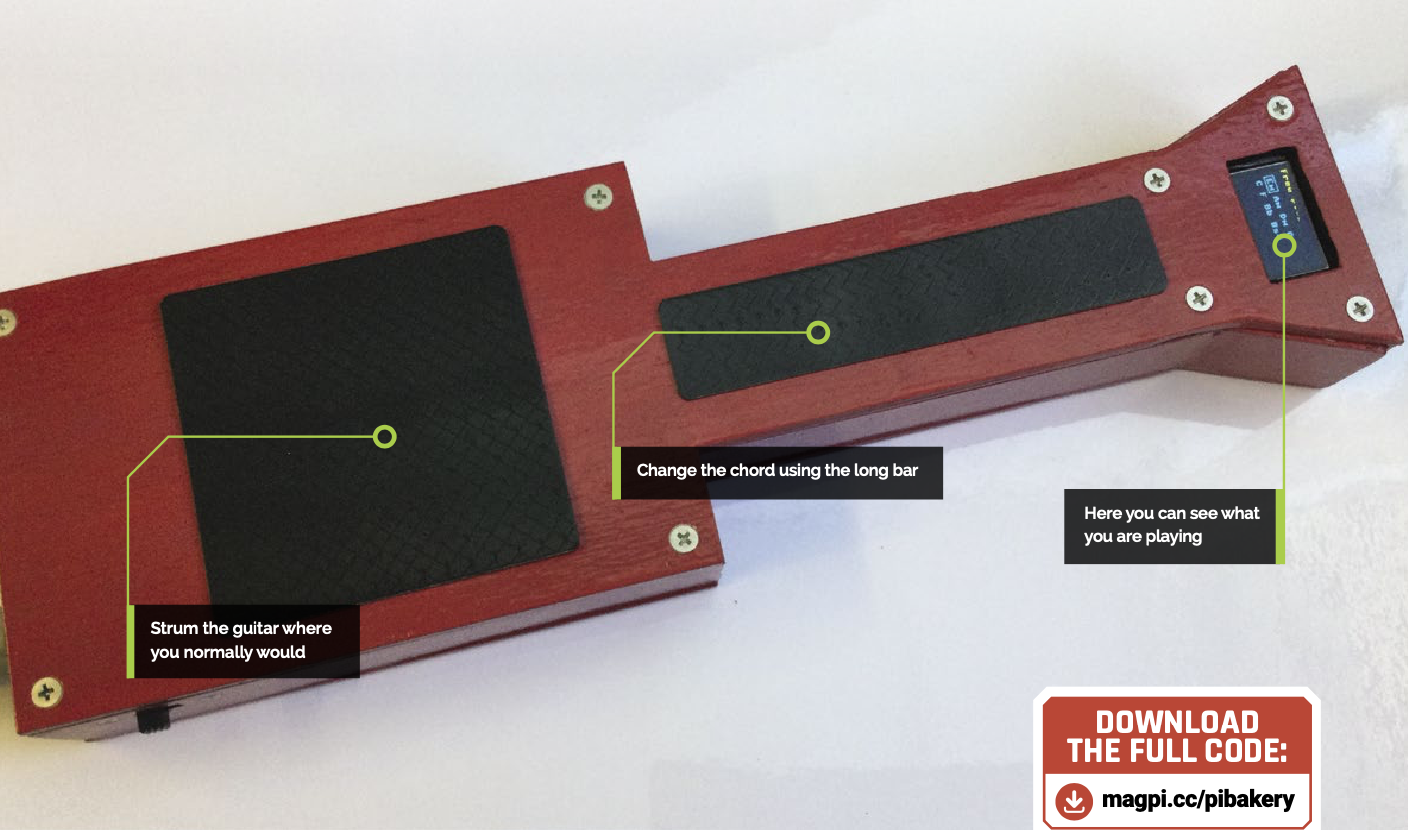
The full Trill guitar, first featured in the MagPi magazine 104.
The software side of things includes a few different modes: configuration, free play and song modes. In the free play mode you can select between a set of 8 chords which are predefined in a configuration file on the Pi Pico. In song mode full songs and their chords can be loaded up and the performer can strum along and change chords with just one button – perfect for guitar karaoke!
About Mike Cook
Mike Cook is an author, engineer and maker. He is a long time contributor to MagPi magazine and the is the second highest contributor to the Arduino forum. He has a unique perspective on art and science, having perused a career in academia, industry and the creative arts.
He previously wrote the book Arduino Music and Audio Projects and has created many weird and wonderful sound and music making devices over the years including a MIDI Glockenspiel, Hexome: a hexagonal Monome controller and an RFID sequencer. You can find many more projects on his website and read his articles every month in MagPi magazine.