A Vocal Effects Unit For Kids
Inspired by kids, built with Bela and Pure Data
In this post Kyle Reiff given us a detailed build guide of an inspiring voice changer and effects unit that he built for his 4 year-old niece. He takes from the inspiration for this project to its realisation in both hardware and software.
Technology To Grow Up With
The following post is a sort of build diary recounting my thought process from initial inspiration, to design and build for one of my first “from scratch” Bela projects. I’m a big fan of repair logs from folks like Allison at Bell Tone and Chris at This Old Synth - so, this is kind of an attempt to capture that spirit, but for something new. Hopefully you can take something from my experience to use in one of your own projects!
Inspiration
The inspiration to dive headfirst into a new project can come in many forms: discovering new timbres on a great record and trying to reverse engineer the magic, getting caught up in shiny new gear at NAMM and trying to build the future… or maybe hearing your 4 year-old niece belt out a pitchy version of “Let It Go” and gunning for that #1 uncle mug by building a vocal effect unit for kids.
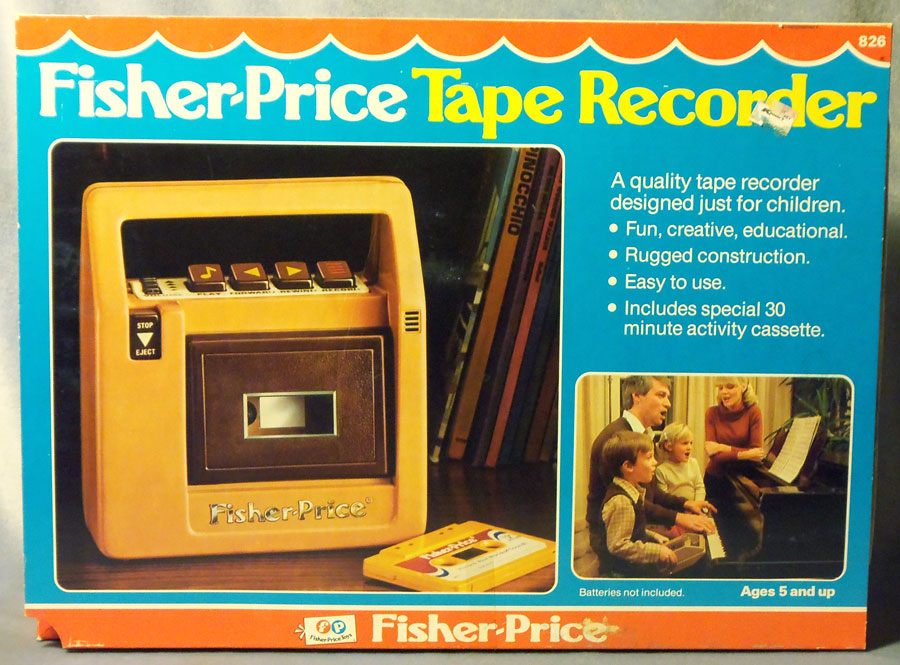
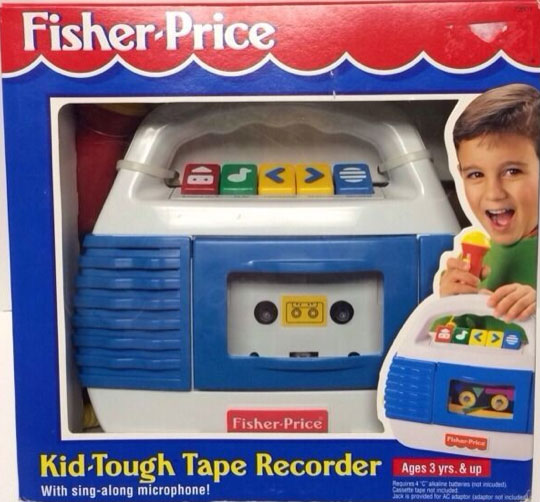
Fisher Price Tape recorders through the ages from www.thisoldtoy.com.
This story is going to be about that last one. Building anything for a child is a tricky proposition. Fisher-Price famously went through dozens of revisions of their children’s tape recorder from 1981-1997 before feeling confident enough to put the term “Kid-Tough” on the box. Apparently, the addition of an elastomeric bumper surrounding the housing separated the original design from its “kid-tough” counterpart. I’m not an engineer by trade – so elastomeric bumpers are a little outside of my wheelhouse… but with Bela, a sturdy hammond enclosure, and some arcade buttons I felt confident I could still make something fun!
Must Haves
Beyond durability, I had five additional “must-haves” in mind for the effect unit:
- Must be portable & stand-alone – Battery powered with an on-board speaker.
- Must have a range of interconnectivity - plug in all manner of audio stuff and it just works whether it’s a phone, computer, guitar, microphone, whatever.
- Must have a dry signal passthrough input – Karaoke anyone?
- Must have flexible output options – onboard speaker, sure, but also an output jack to use with an amp, PA, or home stereo.
- Must be able to “grow” with her – fun for a kid, but still fun for a teen, and possibly a jumping-off point for coding or Pure Data dabbling at the right age.
Most of my anxieties about this project were rooted in the hardware aspect of things, so naturally I kicked things off by assembling the code for the vocal effects. I decided to use Pure Data here just because I’m more comfortable with PD than C++. I also felt that the visual aspect of PD would be a more accessible jumping off point for someone (i.e. my niece) trying to design their own effects.
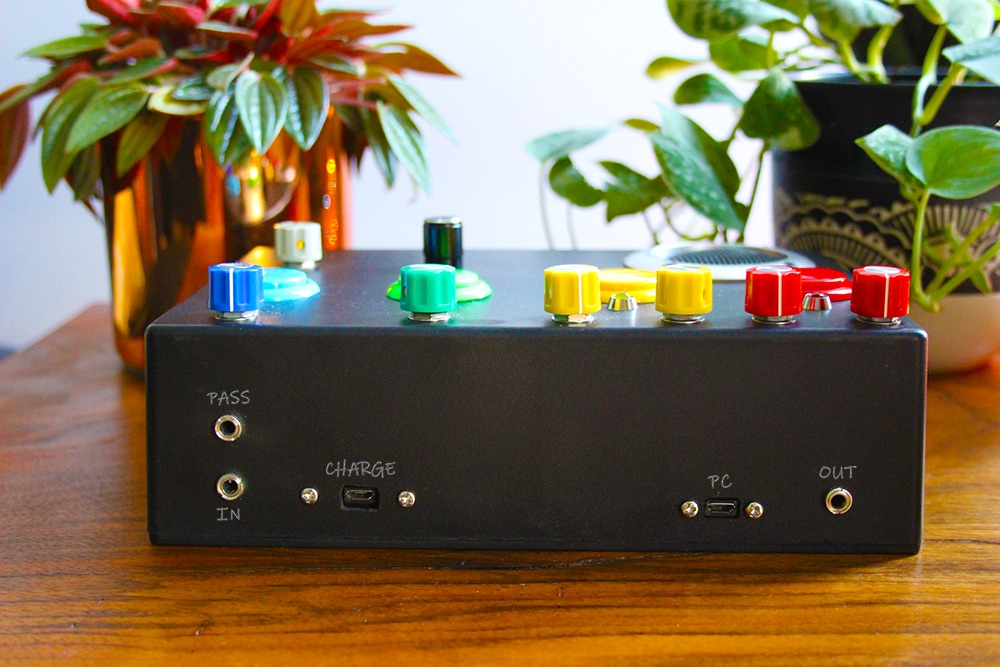
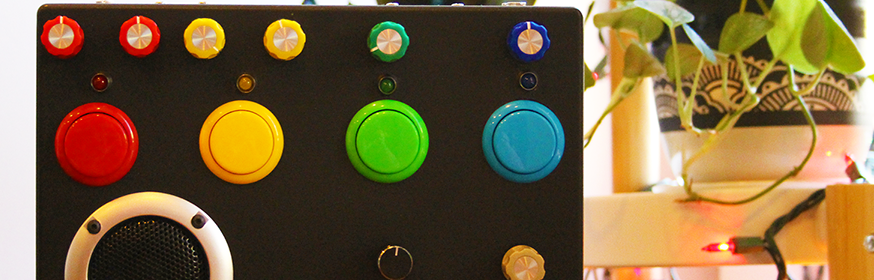
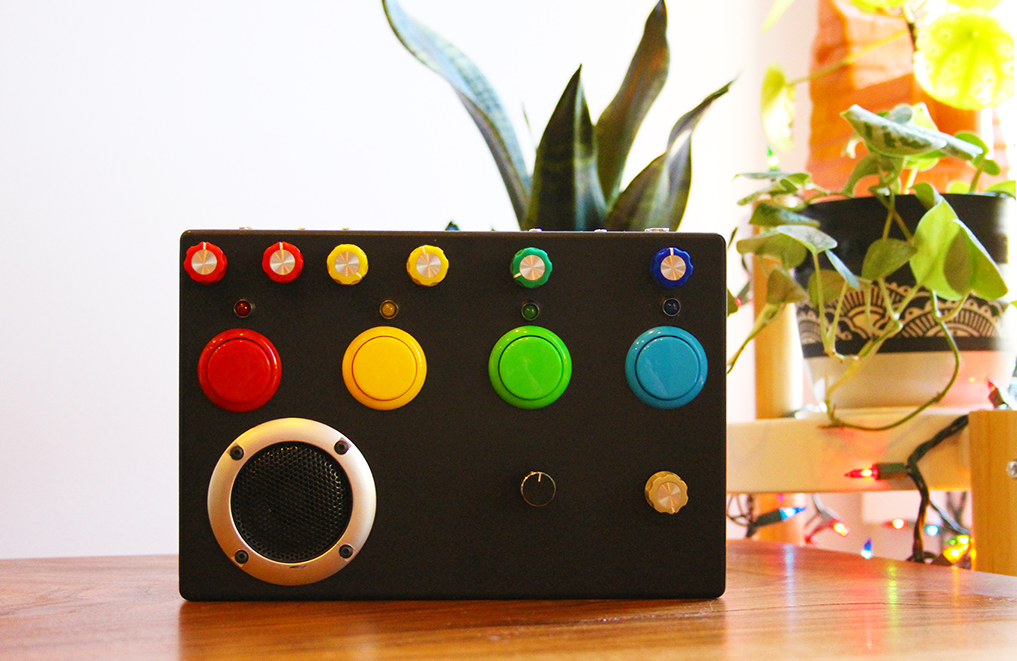
The back of the effects unit.
Which effects did I choose? My initial idea was to create a dead simple vocal effect unit / karaoke machine. I think reverb and delay are pretty universal karaoke effects, but I also needed something that would be fun. Pitch shifting seemed like a natural choice – there is something hilarious, even as an adult, about hearing your voice pitched up on helium. So, pitch, delay, and reverb were a lock.
I wavered on the fourth effect. I initially thought a bit crusher with sample rate modulation would be fun – but it proved to be kind of frightening as a vocal effect. Phasing effects were too subtle. Vibrato seemed repetitive with a pitch shifter already in the box. I eventually settled on a ring-modulator… yeah… How do you explain what a ring-modulator is to a 4-year-old? Robot voice, of course.
Patching Everything Together
With the effects chosen it was time to get coding. This project was meant to be a kids’ toy, after all, so I didn’t go crazy trying to write all the effects from scratch. It’s in the midst of projects like this that I find myself truly grateful for the robust Pure Data community and all the work that has been done with that platform. I’ve been following Katja Vetter’s work with Pure Data effects for a couple years and have used her port of P.A. Tremblay’s Max/MSP external ipoke~ in several delay-based effect projects. If you’ve ever tried to build a tape delay effect in Pure Data using vd~ you’ve likely run into the dreaded “zipper” effect when modulating the delay time. The ipoke~ object is an interpolating buffer~ writer that eliminates the zipper effect and is perfect for modulated delay effects (i.e. flanger, chorus). Despite the need to install a Linux version of the ipoke~ external on Bela (which can be confusing for new Bela users – check this forum post for some explanation) – it seemed like a great option for this application as the smooth pitch shifted effect on the delays when changing the delay time felt truly fun. I simplified the controls by keeping the effect volume static and only creating ADC inputs for the feedback and delay time parameters. I also limited the feedback amount to about 85% – to prevent infinite repeats.

An overview of the signal chain inside the unit.
For the reverb effect I dug back into Katja Vetter’s repository and used her PD Vanilla version of freeverb - it seemed an easy choice for an out-of-the-box reverb and the fact that it works with PD Vanilla meant that I wouldn’t have to go through the process of installing an additional external on Bela. Again, I simplified the controls here connecting just “Room Size” and “Effect Amount” to ADCs.
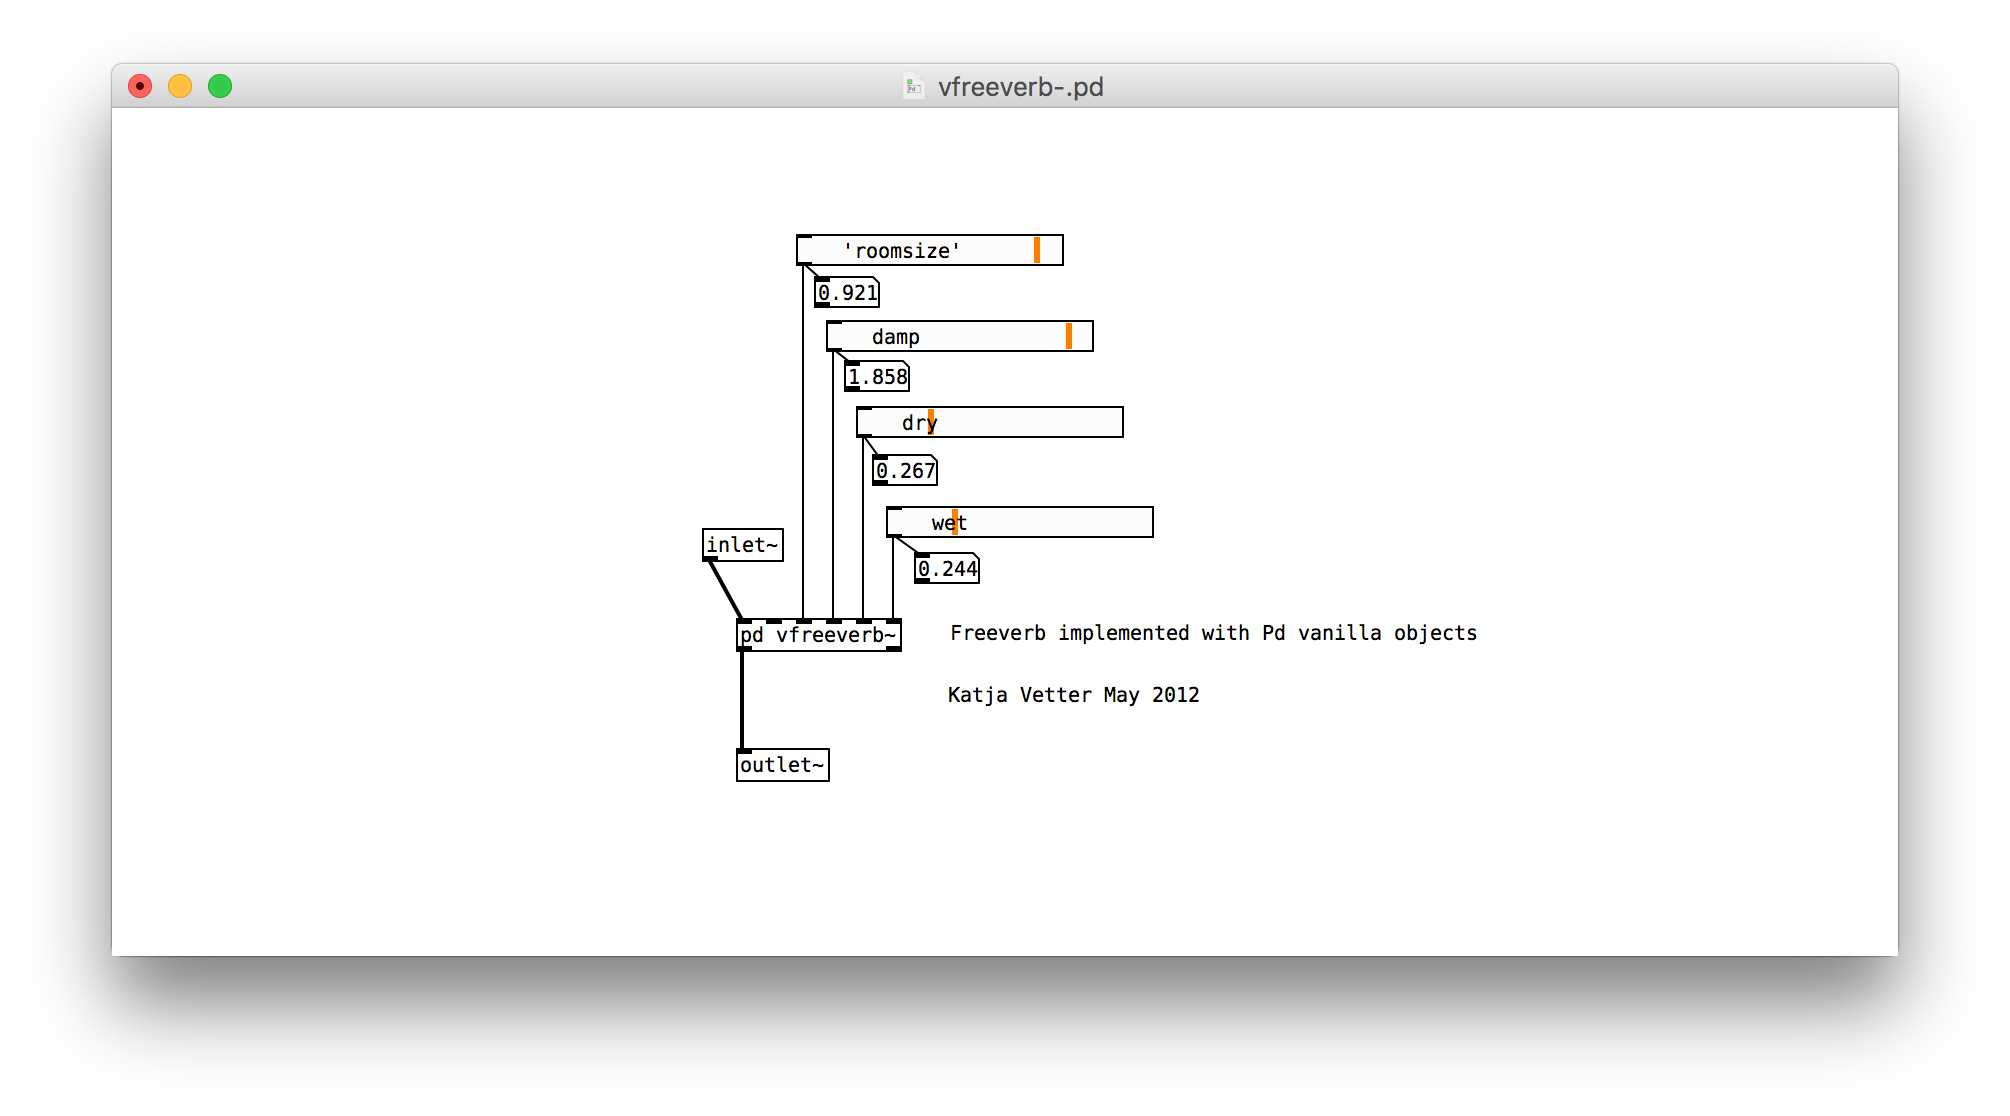
Vfreeverb by Katja Vetter which works great with Bela.
For the pitch-shifter I used Miller Puckette’s rotating-tape-head style pitch shifter example from the Pure Data github repository. It’s a “good enough” pitch shifter for this application – not too much distortion at the upper and lower limits and it also uses only PD Vanilla objects. Just one control needed here for the pitch transposition.
I coded the ring modulator from scratch. A ring modulator is significantly simpler than any of the other effects. Just a sine wave oscillator being multiplied against the input signal. In this case, I set the mix of the input signal and carrier signal at a static ratio and limited the controls to just the pitch of carrier oscillator.
Once I had abstractions for each of the individual effects, I wanted to create a shell to work from that would allow me to route the input signal through each effect in series, but also allow the effects to be “turned-off”. I stumbled on Pierre Massat’s blog while researching examples of this kind of set up in Pure Data and his entry “Effect template with A/B and On/Off switches” provided a great jumping off point for this kind of multi-effect set-up. After joining the abstractions together I was ready to start testing the hardware side of things.
The Hardware
In addition to my niece’s impassioned singing, the design inspiration for this project started with the digdugDIY’s LOFI Dreams sampler. His whimsical design aesthetic and use of arcade buttons seemed like a natural fit for a toy. I vividly remember hammering the buttons of the local Simpsons arcade machine as a kid and they seemed truly indestructible. Beyond that, in my attempt to reverse engineer the LOFI Dreams a couple years ago I had a bunch of 30mm arcade buttons on-hand that would be perfect for this project.
The addition of an internal battery, speaker, and amplifier meant that the enclosure would have to be a bit bigger than a stompbox effect – but for the sake of portability I didn’t want to go any bigger than, say, a Fisher-Price tape recorder.
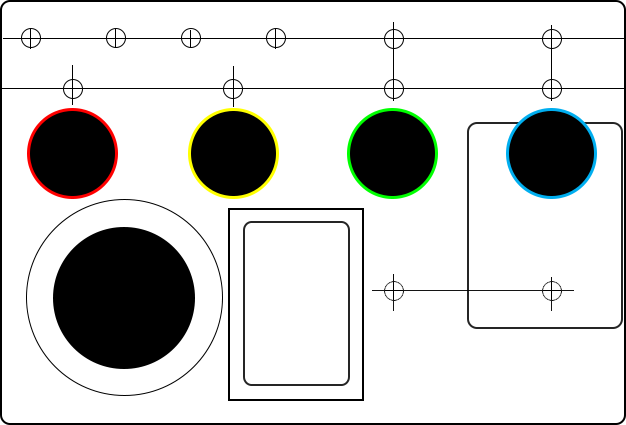
After reviewing speaker specs, it seemed like a 2” speaker would have adequate frequency response and still allow for a fairly compact effect unit – it was at this point that I started sketching out my initial design in Photoshop with the footprint of the arcade buttons, knobs, LEDs, speaker, power bank and Bela in mind.
Initial Photoshop Render / Drill Template
With a tentative layout, I needed to find an enclosure that met my specs and landed on the Hammond 1591XXFSBK. With the enclosure sorted the only remaining parts were a power supply, amp and speaker.
I chose to use this portable power bank as the main power supply. It seemed an easier option than pairing a LIPO battery pack and a separate battery charging PCB. Beyond that, the fact that the power on button is on a different side of the enclosure than the charge ports meant that I could use the power bank’s on/off button as the power button for the effect unit. I just cut one rectangular hole on right side of the enclosure and hot-glued it flush.
This Speaker / 5W Amplifier combo from DROK seemed a good choice for the onboard speaker set-up. The speaker’s frequency range is reasonably good and the form factor was a perfect fit for these speaker covers - an essential option for keeping everything protected and held tightly in place.
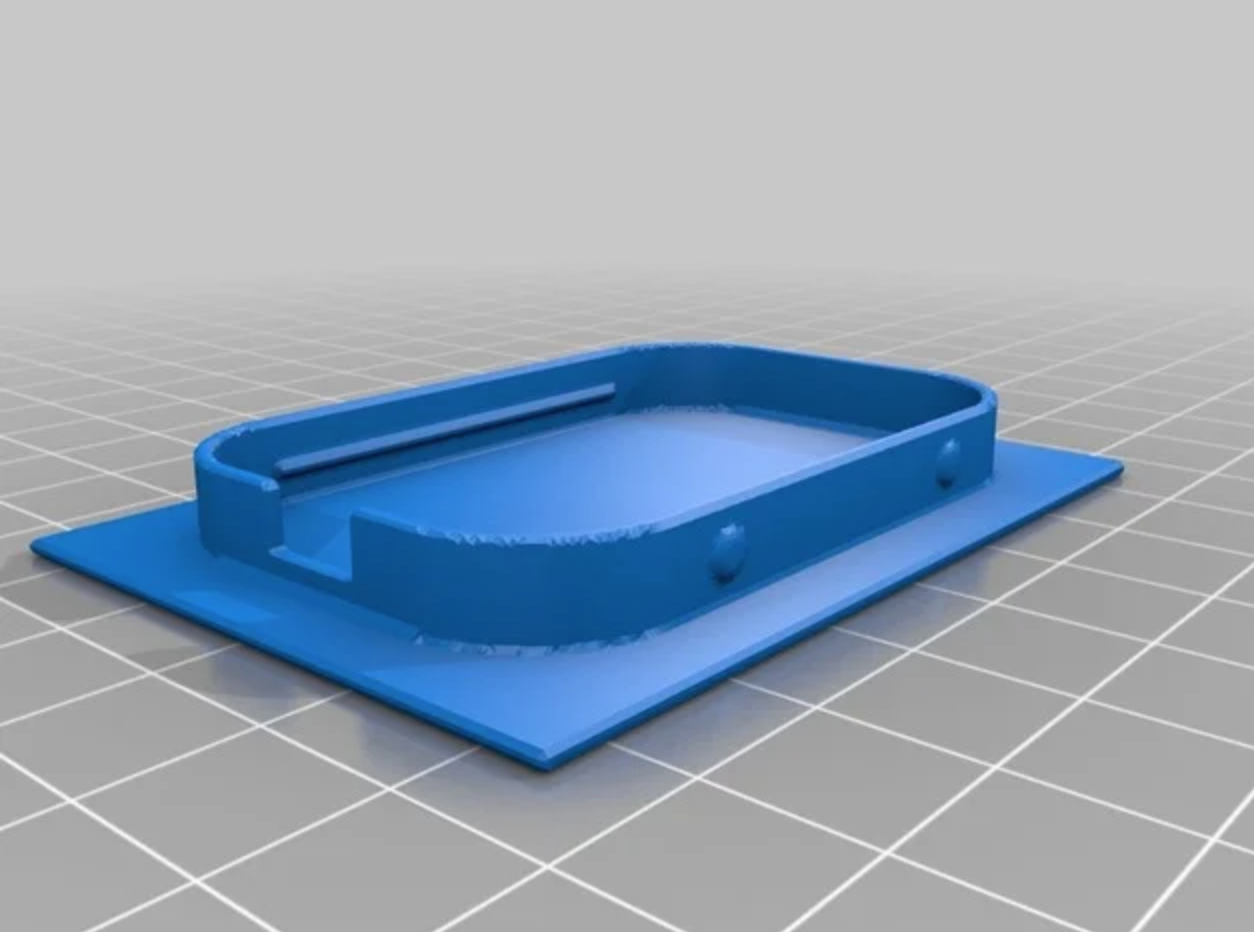
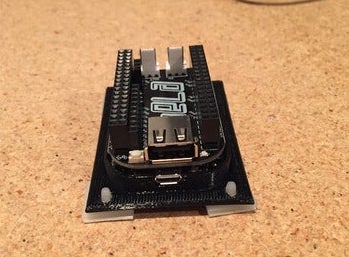
The custom designed Bela Mini cradle.
To keep things compact I decided to go with a Bela Mini rather than a full-sized Bela. While the BeagleBone Black is pre-drilled for PCB standoffs, the PocketBeagle is not. Continuing the durability theme, I decided to incorporate a Bela Mini “cradle” that would allow me to secure the PCB in place even under very strenuous circumstances. I “remixed” this Pocket Beagle enclosure from user Keyglitch and was able to get my design printed via Print-A-Thing fairly quickly and inexpensively (Around $8 USD plus shipping).
With all the hardware decided, I was ready to start assembling!
Bringing It All Together
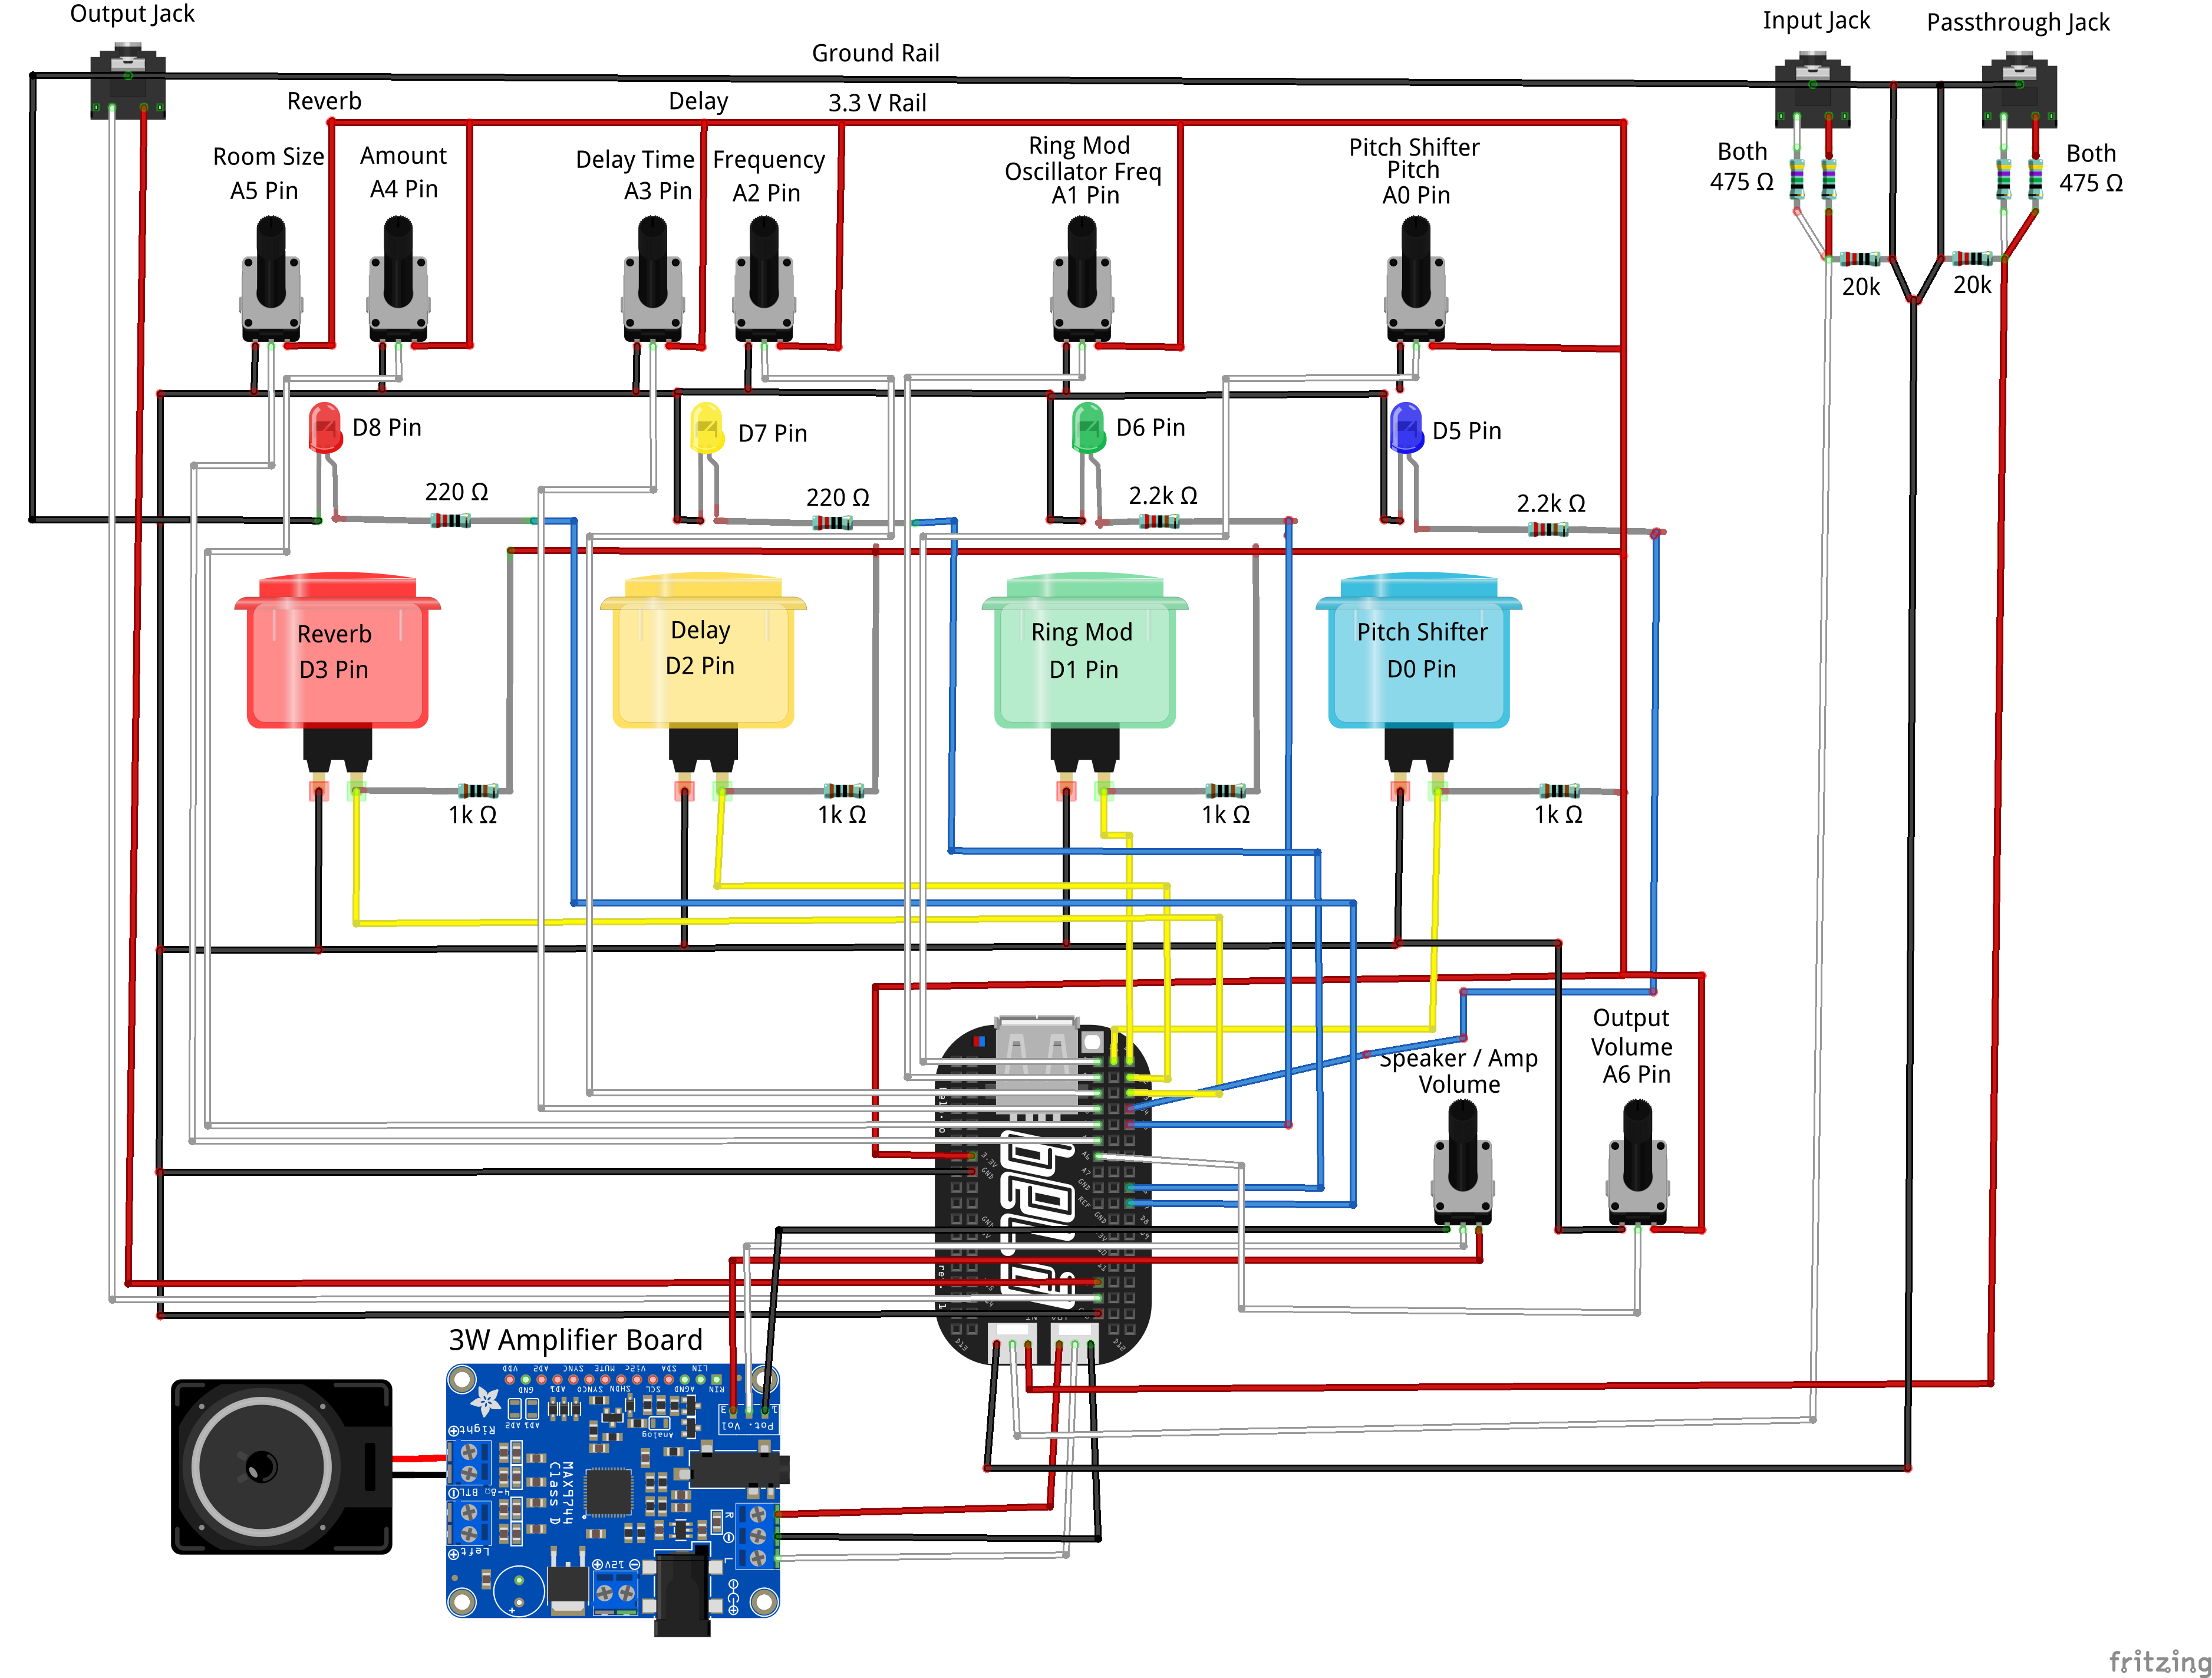
Get a Dremel tool. Seriously. If you’re planning on making one-off effects for friends and family that include giant holes for speakers and perfectly squared edges for power banks and USB ports you need a Dremel tool. You’ll thank yourself later… Anyway, after drilling out the enclosure and going through a proper dry-fit, I put together a fritzing wiring diagram as a guide for assembly. I used the diagram to breadboard an abbreviated version of the circuit to ensure that the Pure Data effects functioned as well on the Bela as they did on my PC.
Taking the time to think through all the connections with Fritzing ended up being time well spent as I found no issues after breadboarding the circuit and from there I was able to build out the final unit in earnest without any issues.
Interconnected
I decided to go with stereo 3.5mm jacks that are summed down to mono for both the passthrough and effected inputs so that both mono and stereo plugs could be used. I gave the final effect box to my sister with a pair of these cheap Audio Technica microphones with 3.5mm plugs as well as an assortment of 3.5mm adaptors. I think that should give it enough interconnectivity for now. If she shows an interest in guitar I can always add a 1/4” jack.
Bela Mini’s provision of 2 stereo outputs (one via the molex connector pins and the other via pin sockets) made it easy to connect the output jack and amplifier simultaneously. I added a “digital” volume control for attenuating volume to the output jack and used the onboard pot for the DROK amplifier to handle volume to the on-board speaker.
In order to fulfill the goal of allowing it to grow with her I also made sure that the micro USB connection to update the Bela program was available on the outside of the unit – I used this panel mounting micro USB extension cable to provide a micro USB connection on the outside of the enclosure.
Happiness Is…
Before handing it over to my niece I wanted to thoroughly test it for durability and function. Through this process I was consistently surprised at how much fun I was having just making weird sounds and manipulating the effects. Before sending the final unit over to my sister I decided to hook it up to my phone to “prank call” her through the effect box. It felt very Longmont Potion Castle and I could easily see my niece doing the same thing in a couple of years.
Fast forward - My niece absolutely loves this thing. I officially gave it to her on Christmas Eve of last year and come Christmas morning, even after all the other presents were open, she still wanted to play with the Bela voice box. It was one of the prouder moments I’ve had as an uncle and a DIY nerd. I can’t say designing an off-the-wall effect for myself has ever made me as happy was watching my niece and nephew make wacky sounds through this silly effect box. So, to close this blog post here is a little Christmas morning noise show courtesy of my niece and nephew:
A huge thanks goes to Kyle Reiff (and his niece and nephew) for sharing this project with us.